
Weavers’ tricks of the trade
I’ve almost completed drafting the 17th-century Kashmir shawl motif, for which I propose to weave a prototype, and so to vary my routine and not lose time waiting for one or the other phase to be ready to continue, I’ve started to prepare the loom I’ll be using, an ancient-looking, locally-built barn loom with a four shaft, countermarche action. Under the guidance of the redoubtable Vasudevan at Tasara Centre for Creative Weaving, I’ve already been shown a couple of arcane weavers’ tricks of the trade, in the course of measuring off my warp and bringing it to the loom. Yesterday my head hurt, and today it’s my fingers.
joining new warp to old
The easier thing to describe and illustrate is how to graft a new warp onto a harness and reed that still carry the remnant of the previous warp. Assuming that the threading of the two warps are similar enough in number of shafts and sequence, and the accuracy of the previous threading was proved by the now-absent yardage, the claim is that it’s easier to attach the new warp to the old, than to thread the new one afresh.
To set up, you determine the number and placement of the new warp threads in relation to the old, wind the new warp on the back beam and bring the cross of the new warp threads up to the back of the harness. For the old warp threads, recover or re-create the cross just behind the harness – you now have two sets of threads each sorted over-one-under-one as a check on broken or missing threads or other mistakes. The trick is to join them up – it sounds like a lot of knot-tying, but the joining is a little easier than that.
Position yourself between the two warps. Working from the far side of the warp to the near, gather a convenient bunch of both warp ends and knot them loosely together. Vasudevan ties this knot to a band around his waist, so that when he leans away the warps are taut and easy to pick off the crosses, and when he leans in the pair of warps he’s selected to join are more slack – he calls it the “backstrap-weaving” feature.
The trick to joining the two warp threads is this: pinch the two together under tension with your harness-side hand and cut the ends off the knot leaving free ends about 3 cm. long. With your back-beam hand roll the two free ends tightly together in one direction, and then roll them in the opposite direction around the new warp thread, in a rudimentary effort to ply them together. When you release your grip, the remaining tension between the old and new threads should be enough to hold the twisted ends in place. I can say that beginner’s frustration does yield to practice, and it becomes a simple, repetitive routine, requiring very little oversight. In India’s declining handloom industry, Vasudevan says there were professional loom-dressers that did this particular task all day, thousands of ends, working strictly by touch.
The proof of this method is being able to delicately drag and coax the new warp ends through the heddle eyes and the dents of the reed, with a minimum number coming detached and requiring threading in the usual way. Vasudevan’s brother Balakrishnan and I worked on this, advancing the warp from back beam to front, not removing the cross, and maintaining some tension, until the row of joins was just behind the nearest shaft, then swung each shaft in turn over the joins. Only 20 or 30 of the joins didn’t make it through, and by locating the position of each loose end in the cross, it was easily matched with the empty heddle. We gave up on the reed, which was covered in rust after sitting idle in the open air for two years, but in the course of threading a new reed in the usual way, I was able to verify the threading of the shafts from edge to edge. Still, it was easier than a completely new threading, and to a lesser degree, faster.
The thing that made my head hurt yesterday, for being challenged to get it right without exactly understanding what I was doing, is also a lot harder to describe in words. It’s a series of finger manipulations that allow you to quickly measure off a warp with a large number of ends, while still being able to organize it with a one-over-one-under cross.
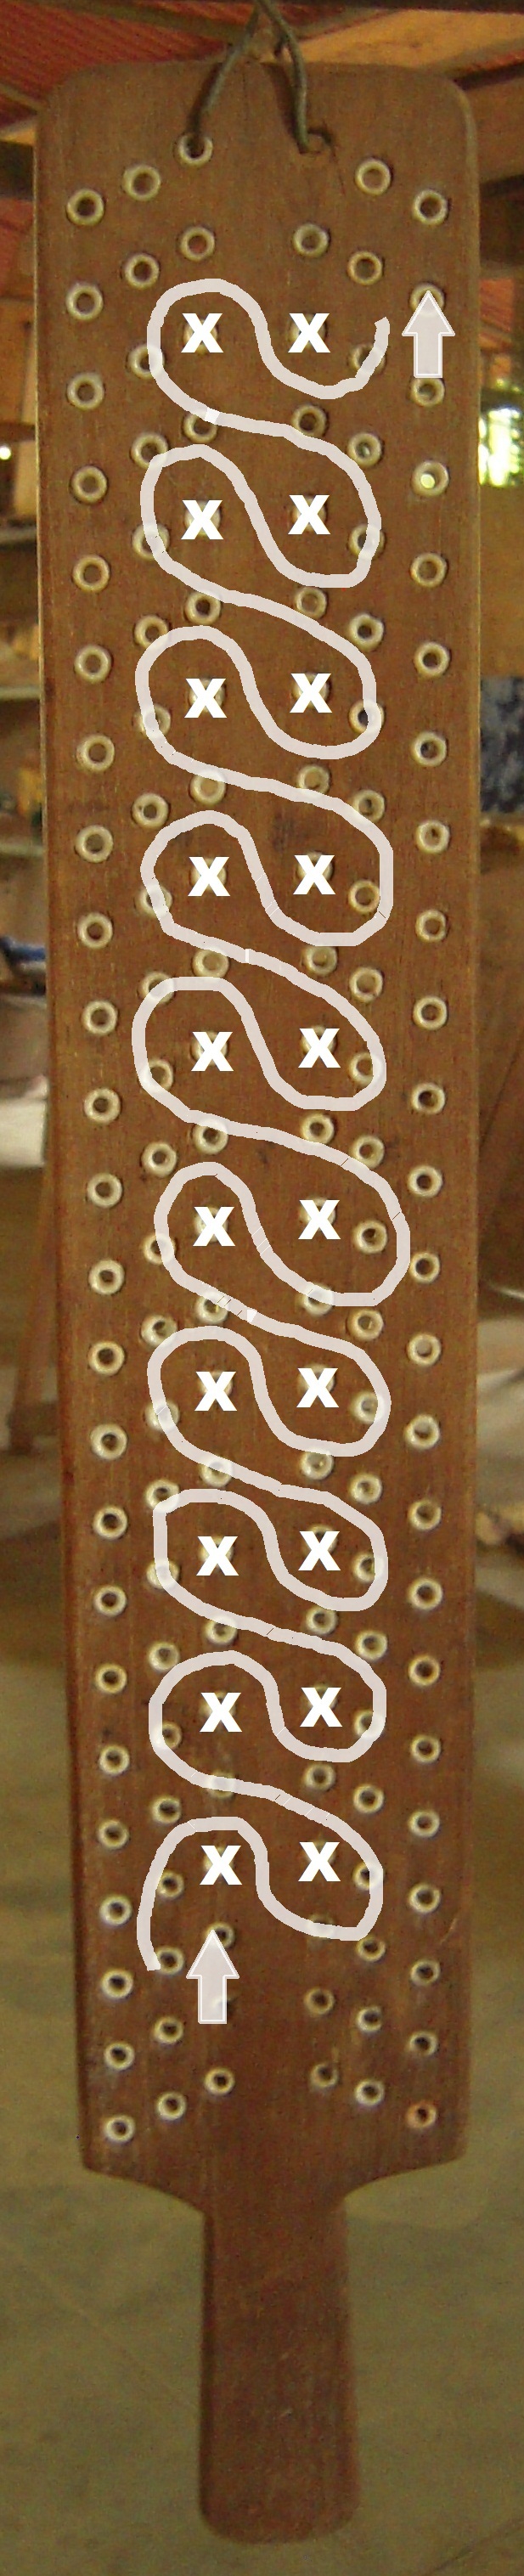
#1 X’s are warp threads; path is right index finger
I started with twenty bobbins of warp thread, to prepare a warp of 400 ends. The first step was to feed the threads through a paddle in a column of pairs. The 20 ends were tied onto a peg on the warping mill where the front beam of the warp would be, closely followed by two other pegs where the cross would be formed. Now, holding the paddle in my left hand in order to wind on the warp in a counterclockwise direction, with my right index finger I trace the path shown in illustration #1, running my fingertip over the surface of the paddle, and snagging all 20 threads in the order the path produces. At the end of that step, the 10 threads on each side of my index finger are transfered to the first peg of the cross. Next, I run my right index finger straight up the middle of the paddle between the pairs of threads, and similarly transfer the 10 threads on each side onto the second peg of the cross. From there, I proceed to wind on the length of the warp, loop all threads together around two pegs at the back-beam-end of the warp for a 20 by 20 cross, and double back. Arriving back at the front cross, I essentially perform both the previous manipulations at the same time: with my right index finger I run straight up the middle between the pairs, and my thumb follows behind, tracing the meandering path in illustration #2.
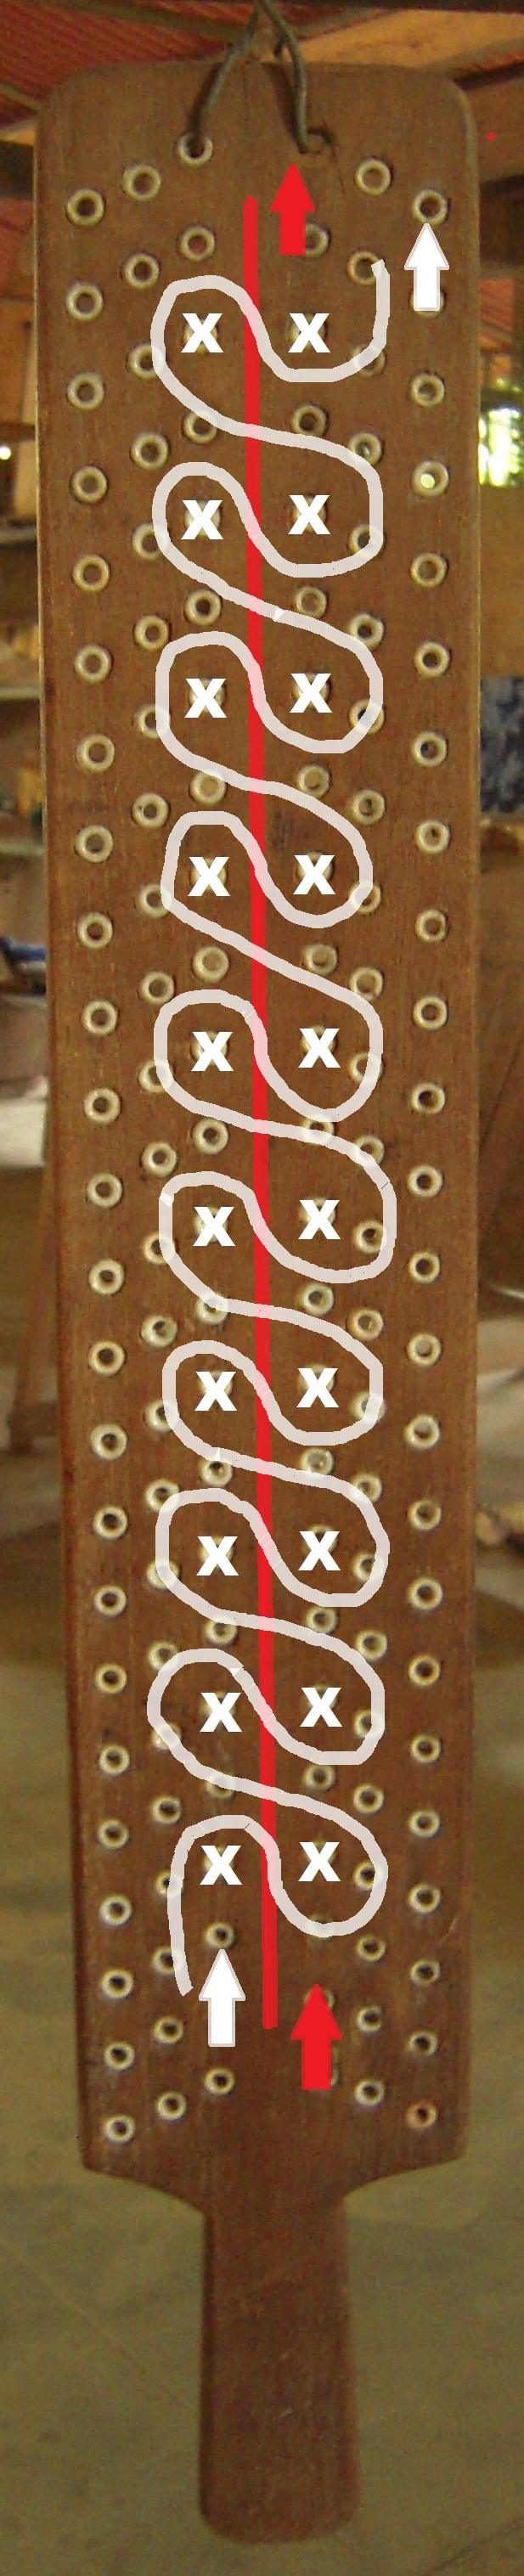
#2 red path is right index finger; white path is thumb following
Singlehandedly, so to speak, the cross has been created for the second set of 20 threads. The arrangement of threads around my index finger is transferred onto the second – the back beam side – peg, and the arrangement of threads around my thumb is transferred onto the first – the front side of the cross – peg. A quick turn around the front beam end peg, and I’m ready to lay down another 40 threads, for a warp of 400 in 10 back-and-forth passes. Before I had really gotten used to it, it was done.

