
Toy Piano Counterbalance Loom 2: Construction
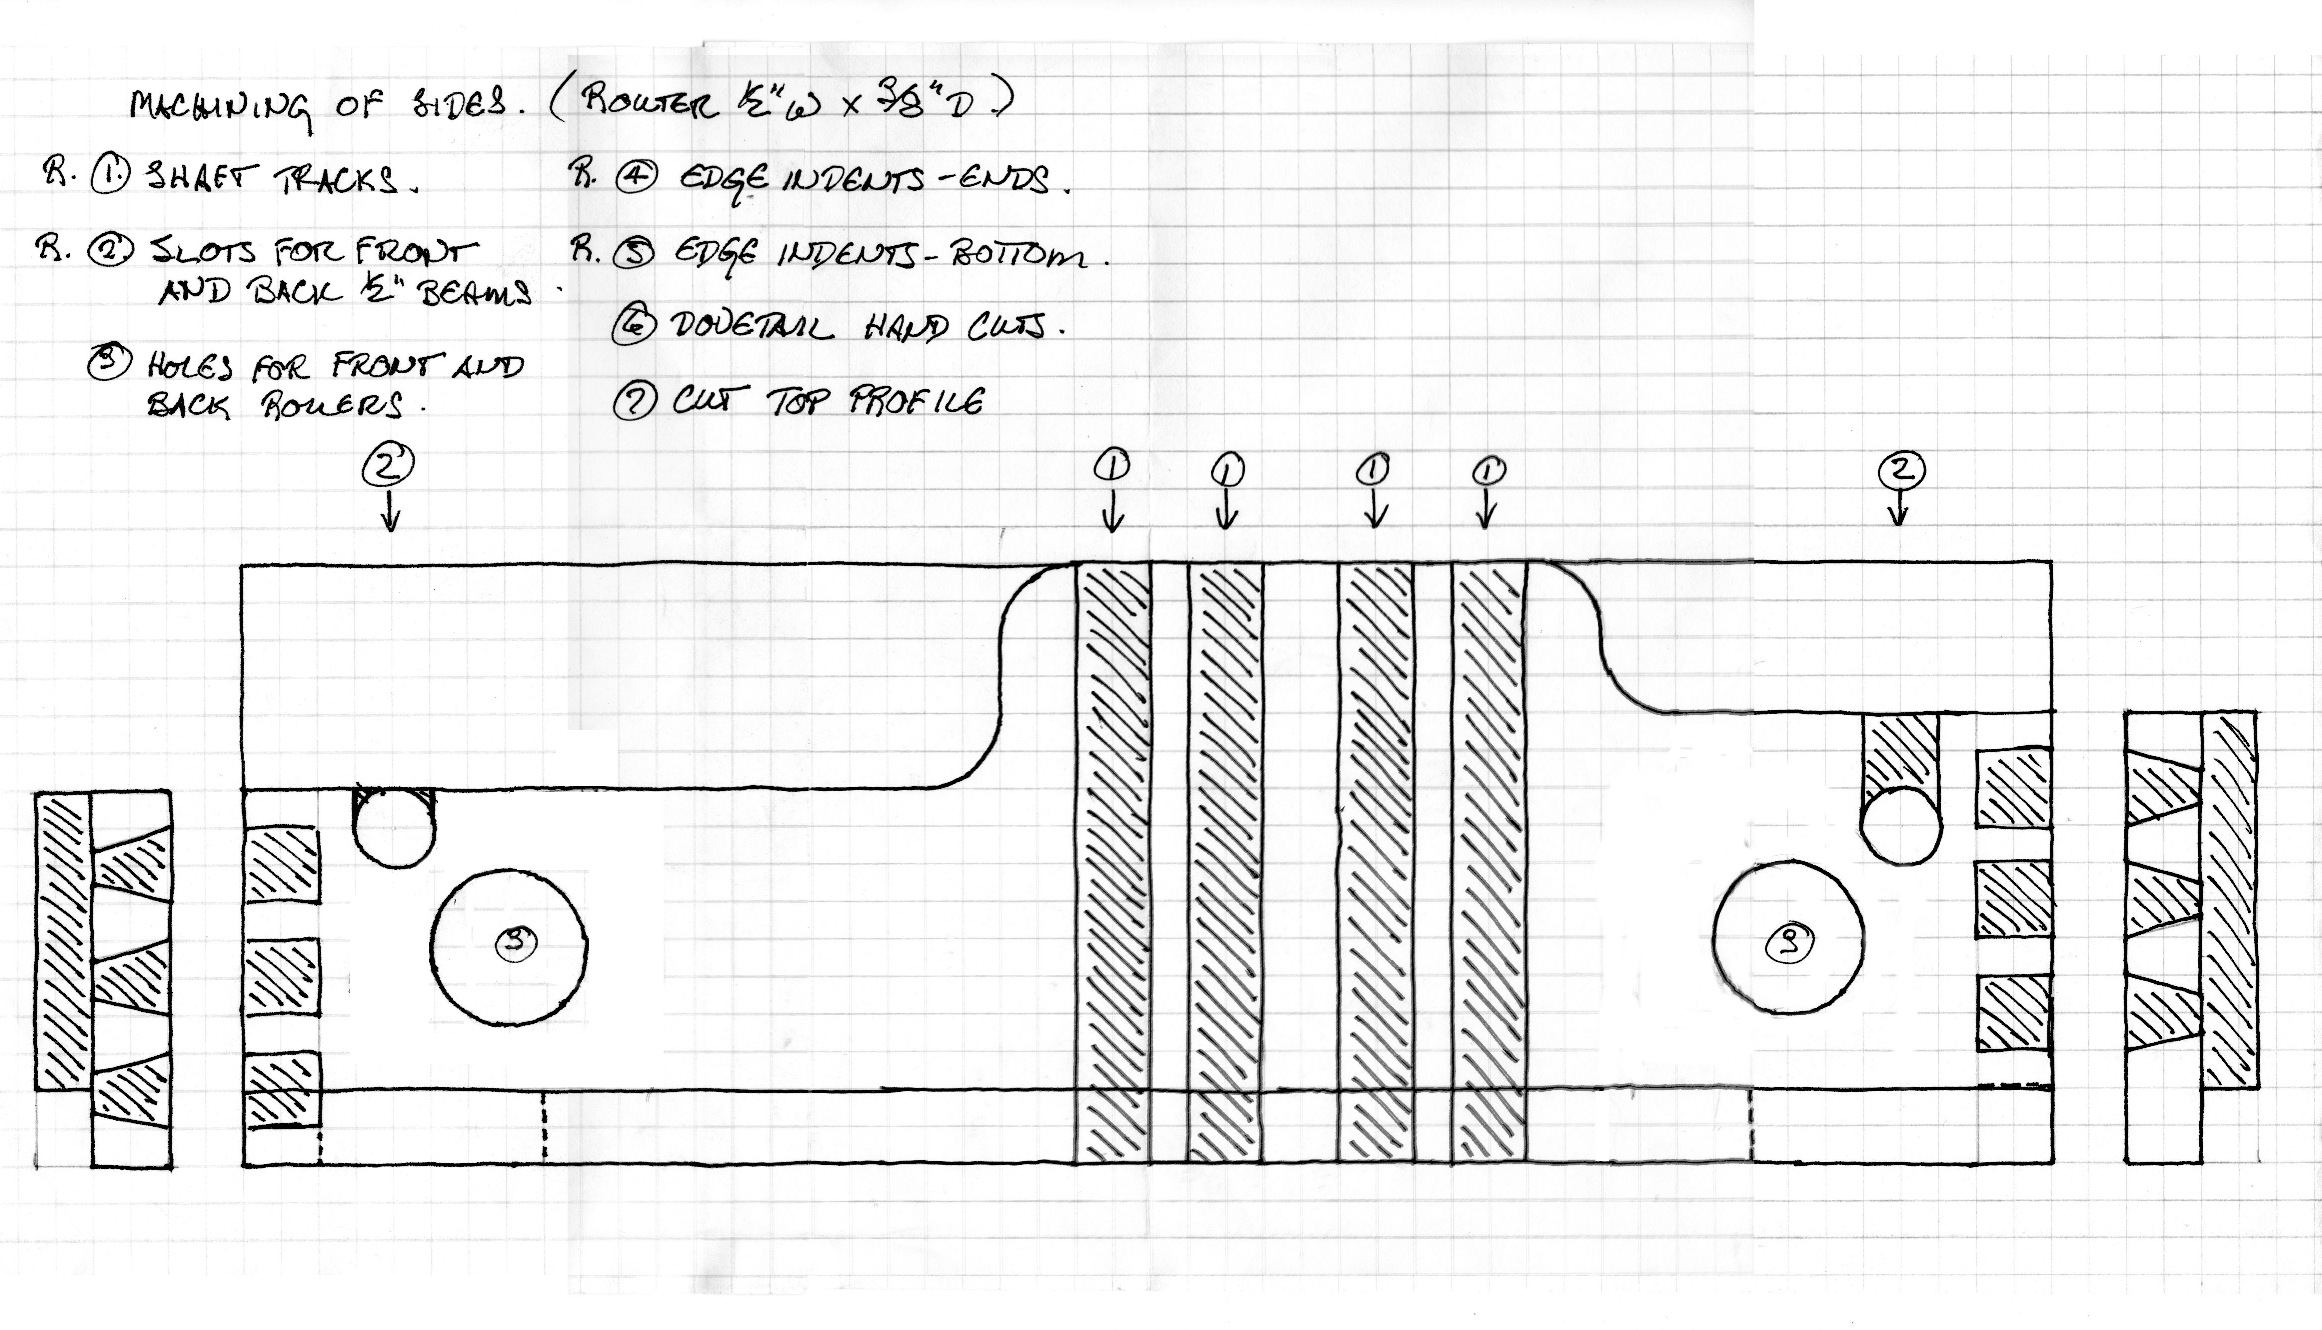
The transition from a two-dimensional model to a three-dimensional prototype for a working loom is essentially simple. Most of the provisions for the mechanism are visible in the drawing of the side panels: the tracks for the up-and-down movement of the shafts, the sockets for the front and back rollers, slots to drop in the front and back beams. The two panels were machined from thicker pieces of hardwood using a hand-held router, a bandsaw, and a drill-press, and various homemade jigs to guide the work. The dovetail joints at the corners were arranged to hold the two sides of the frame rigidly parallel.
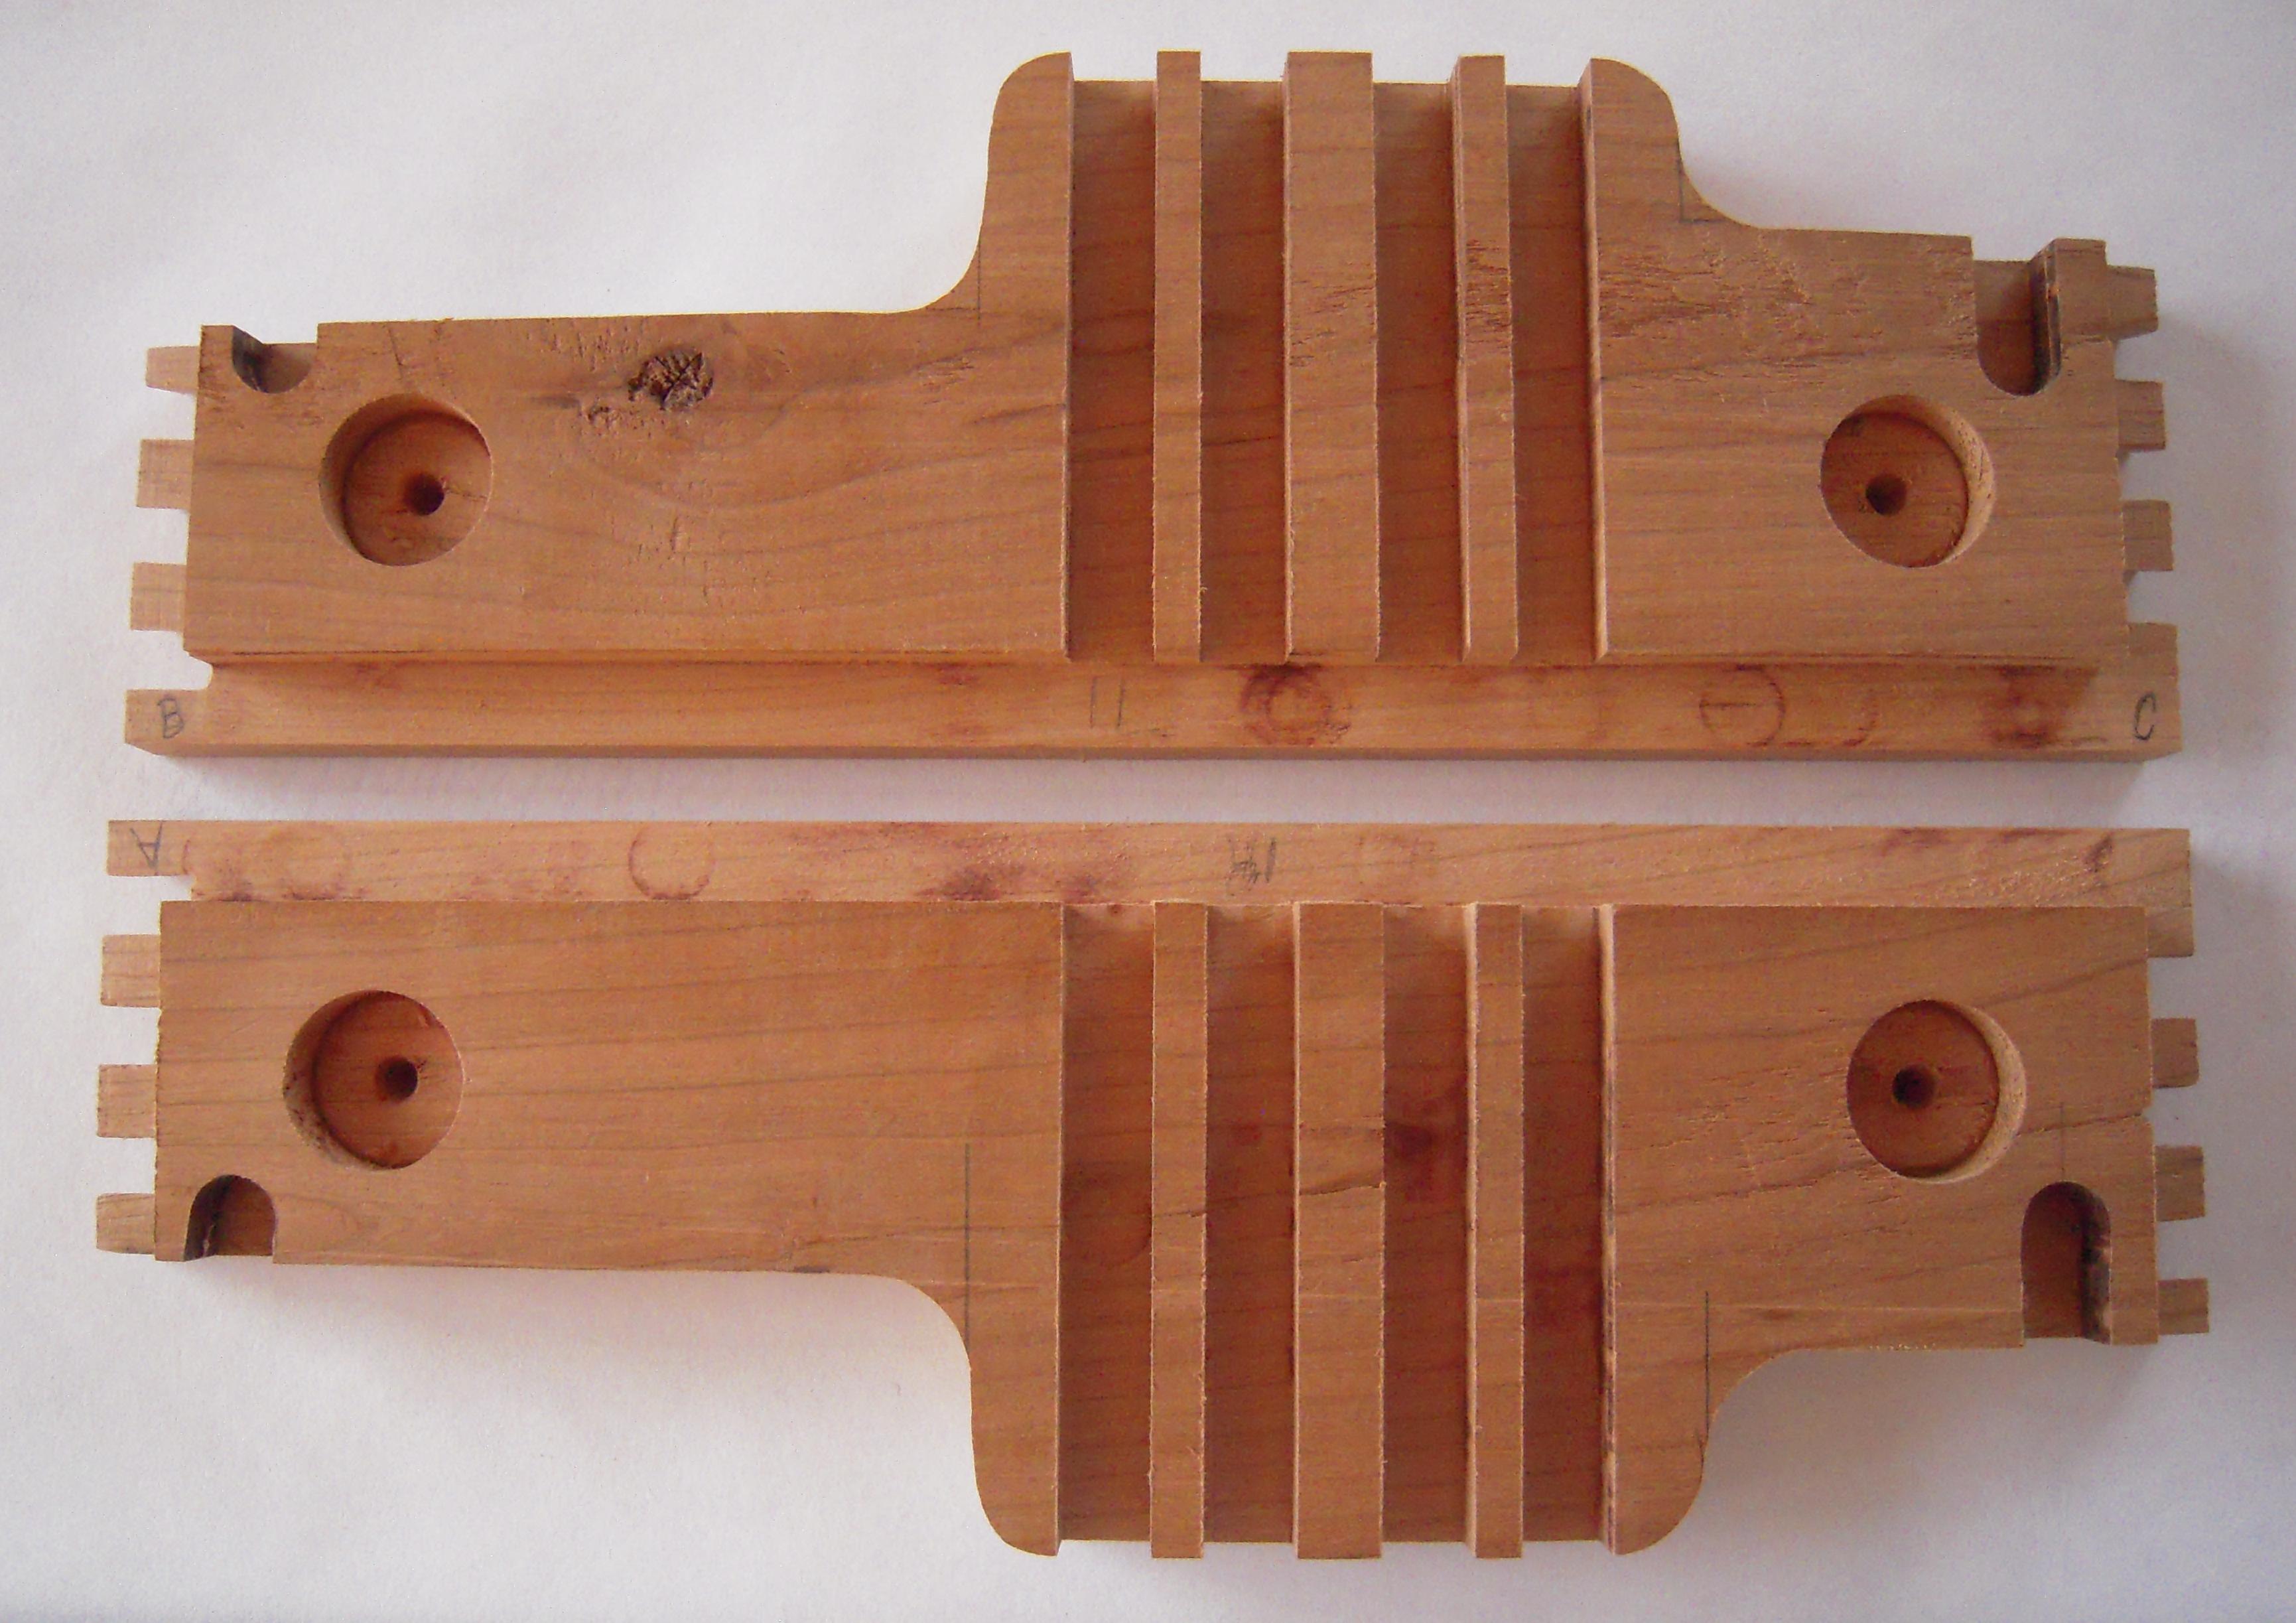
1. side panels

2. frame elevation view
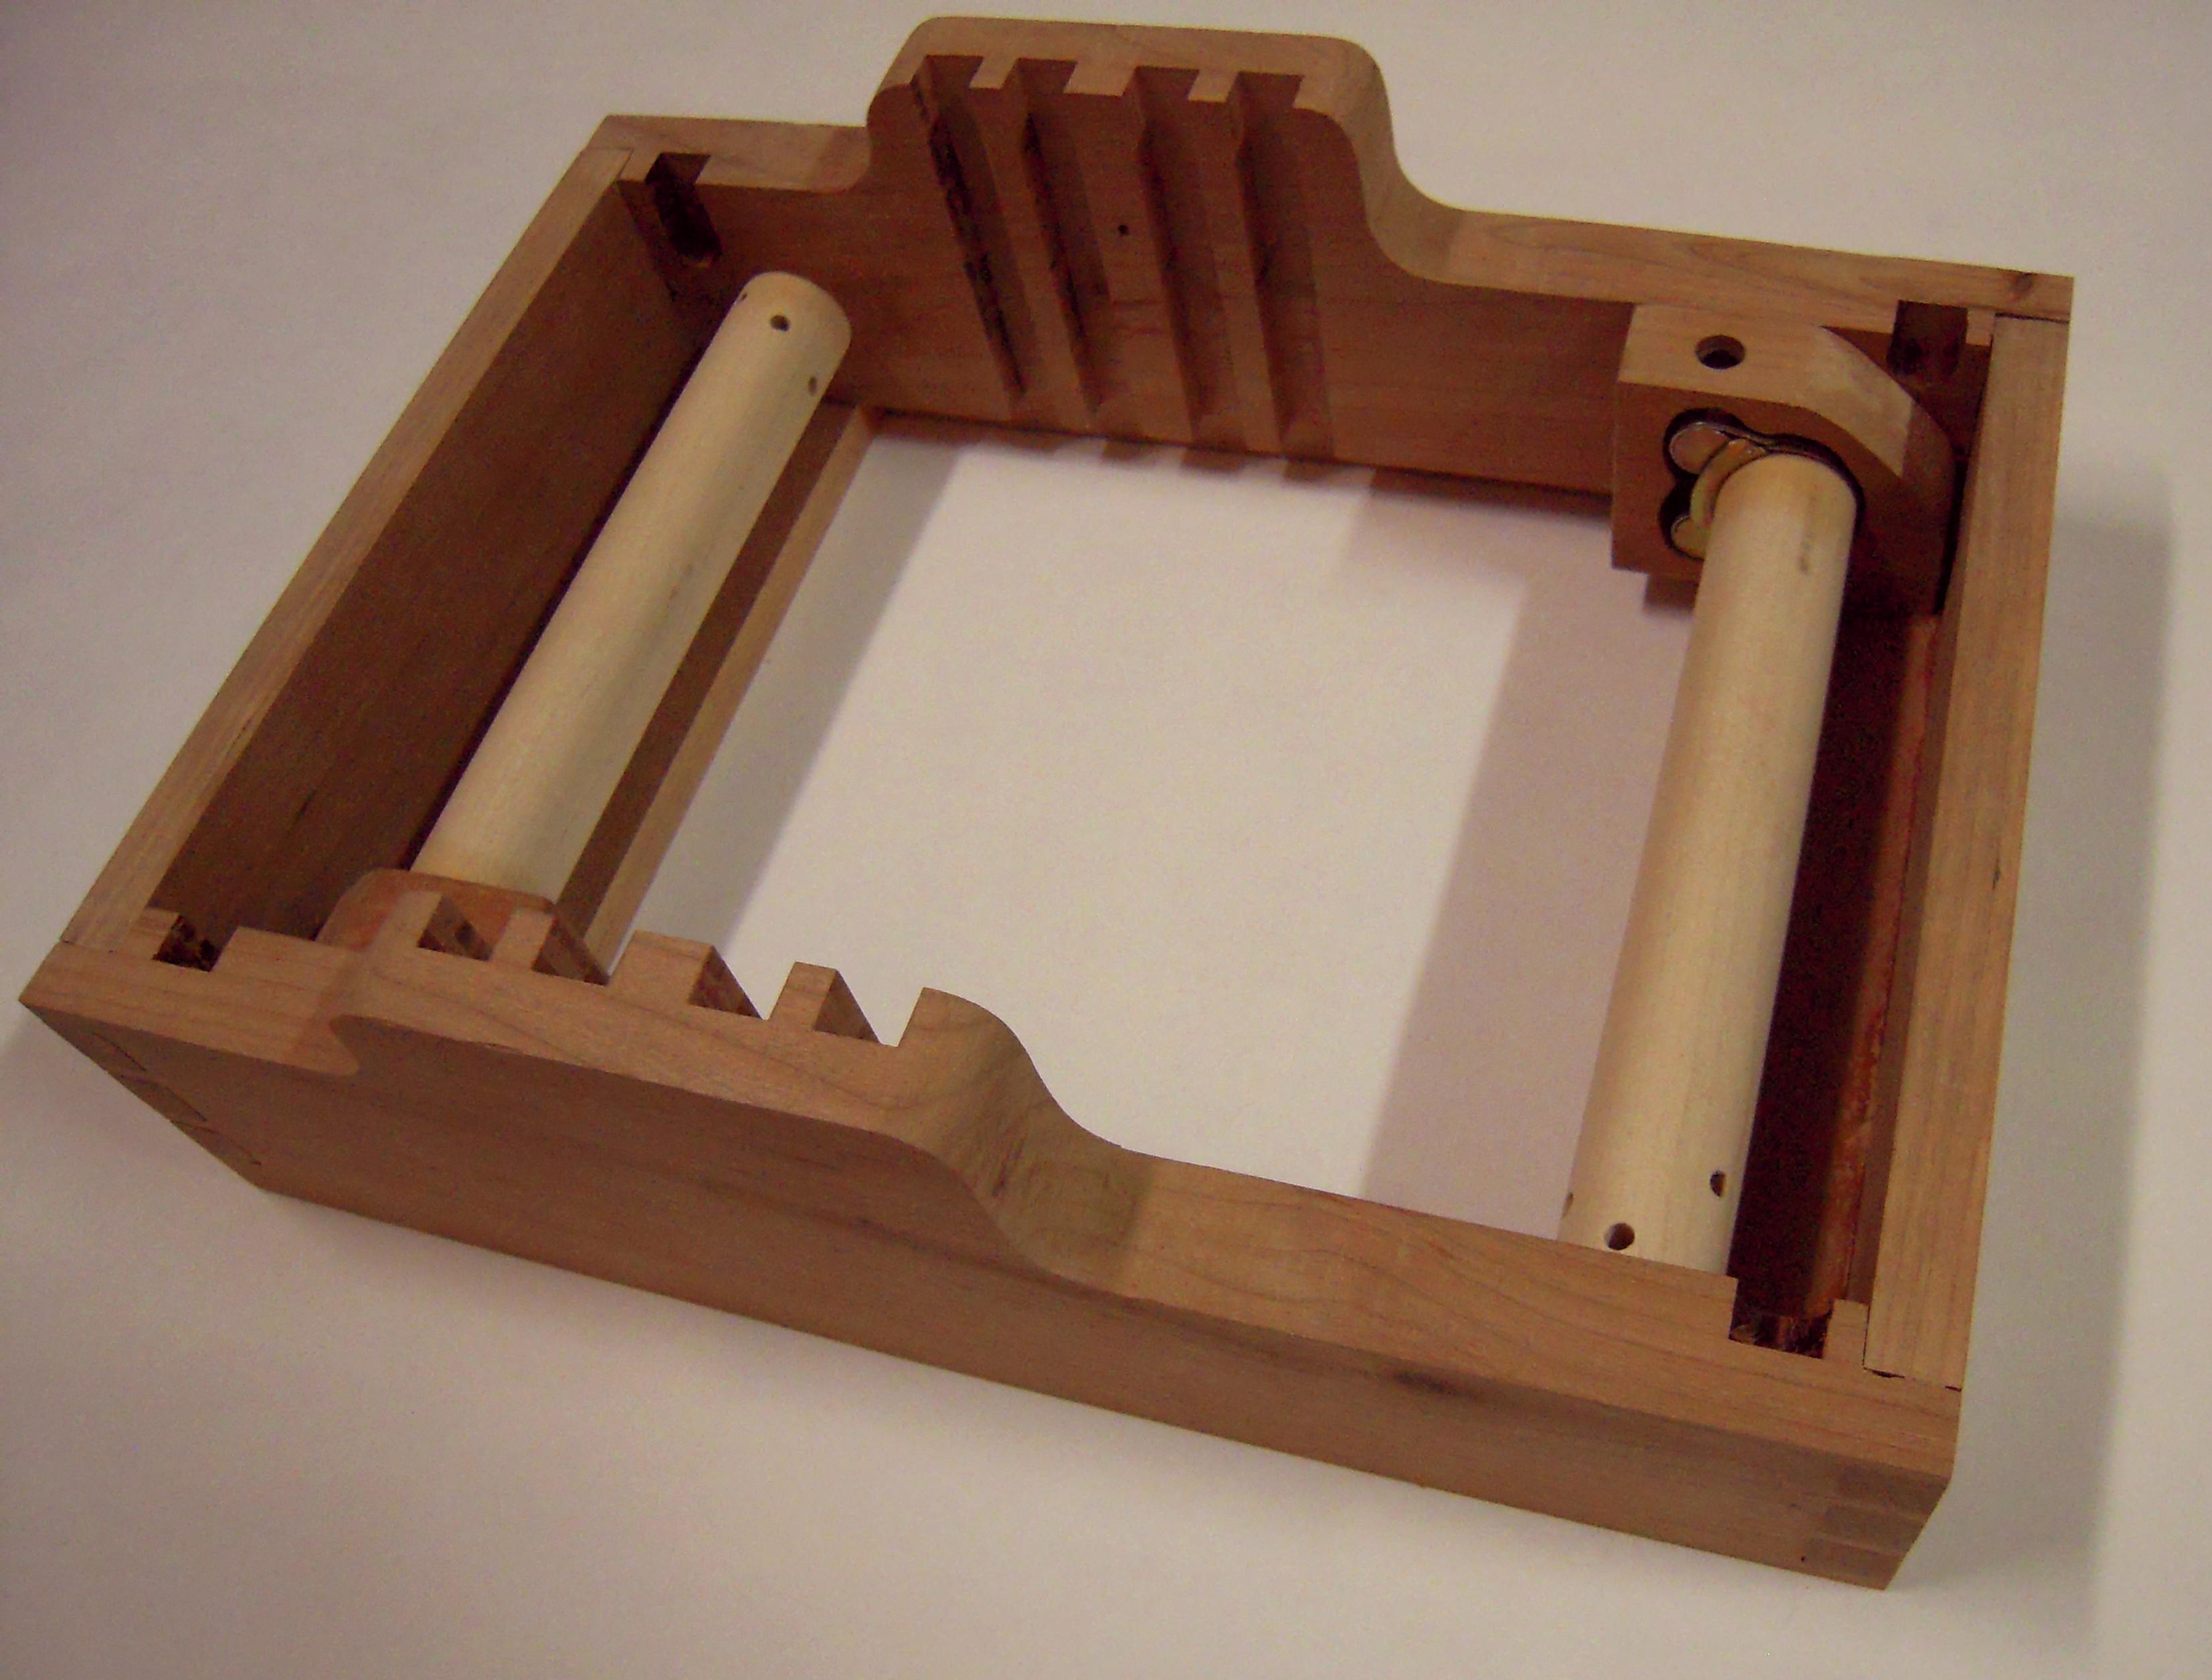
3. frame assembled
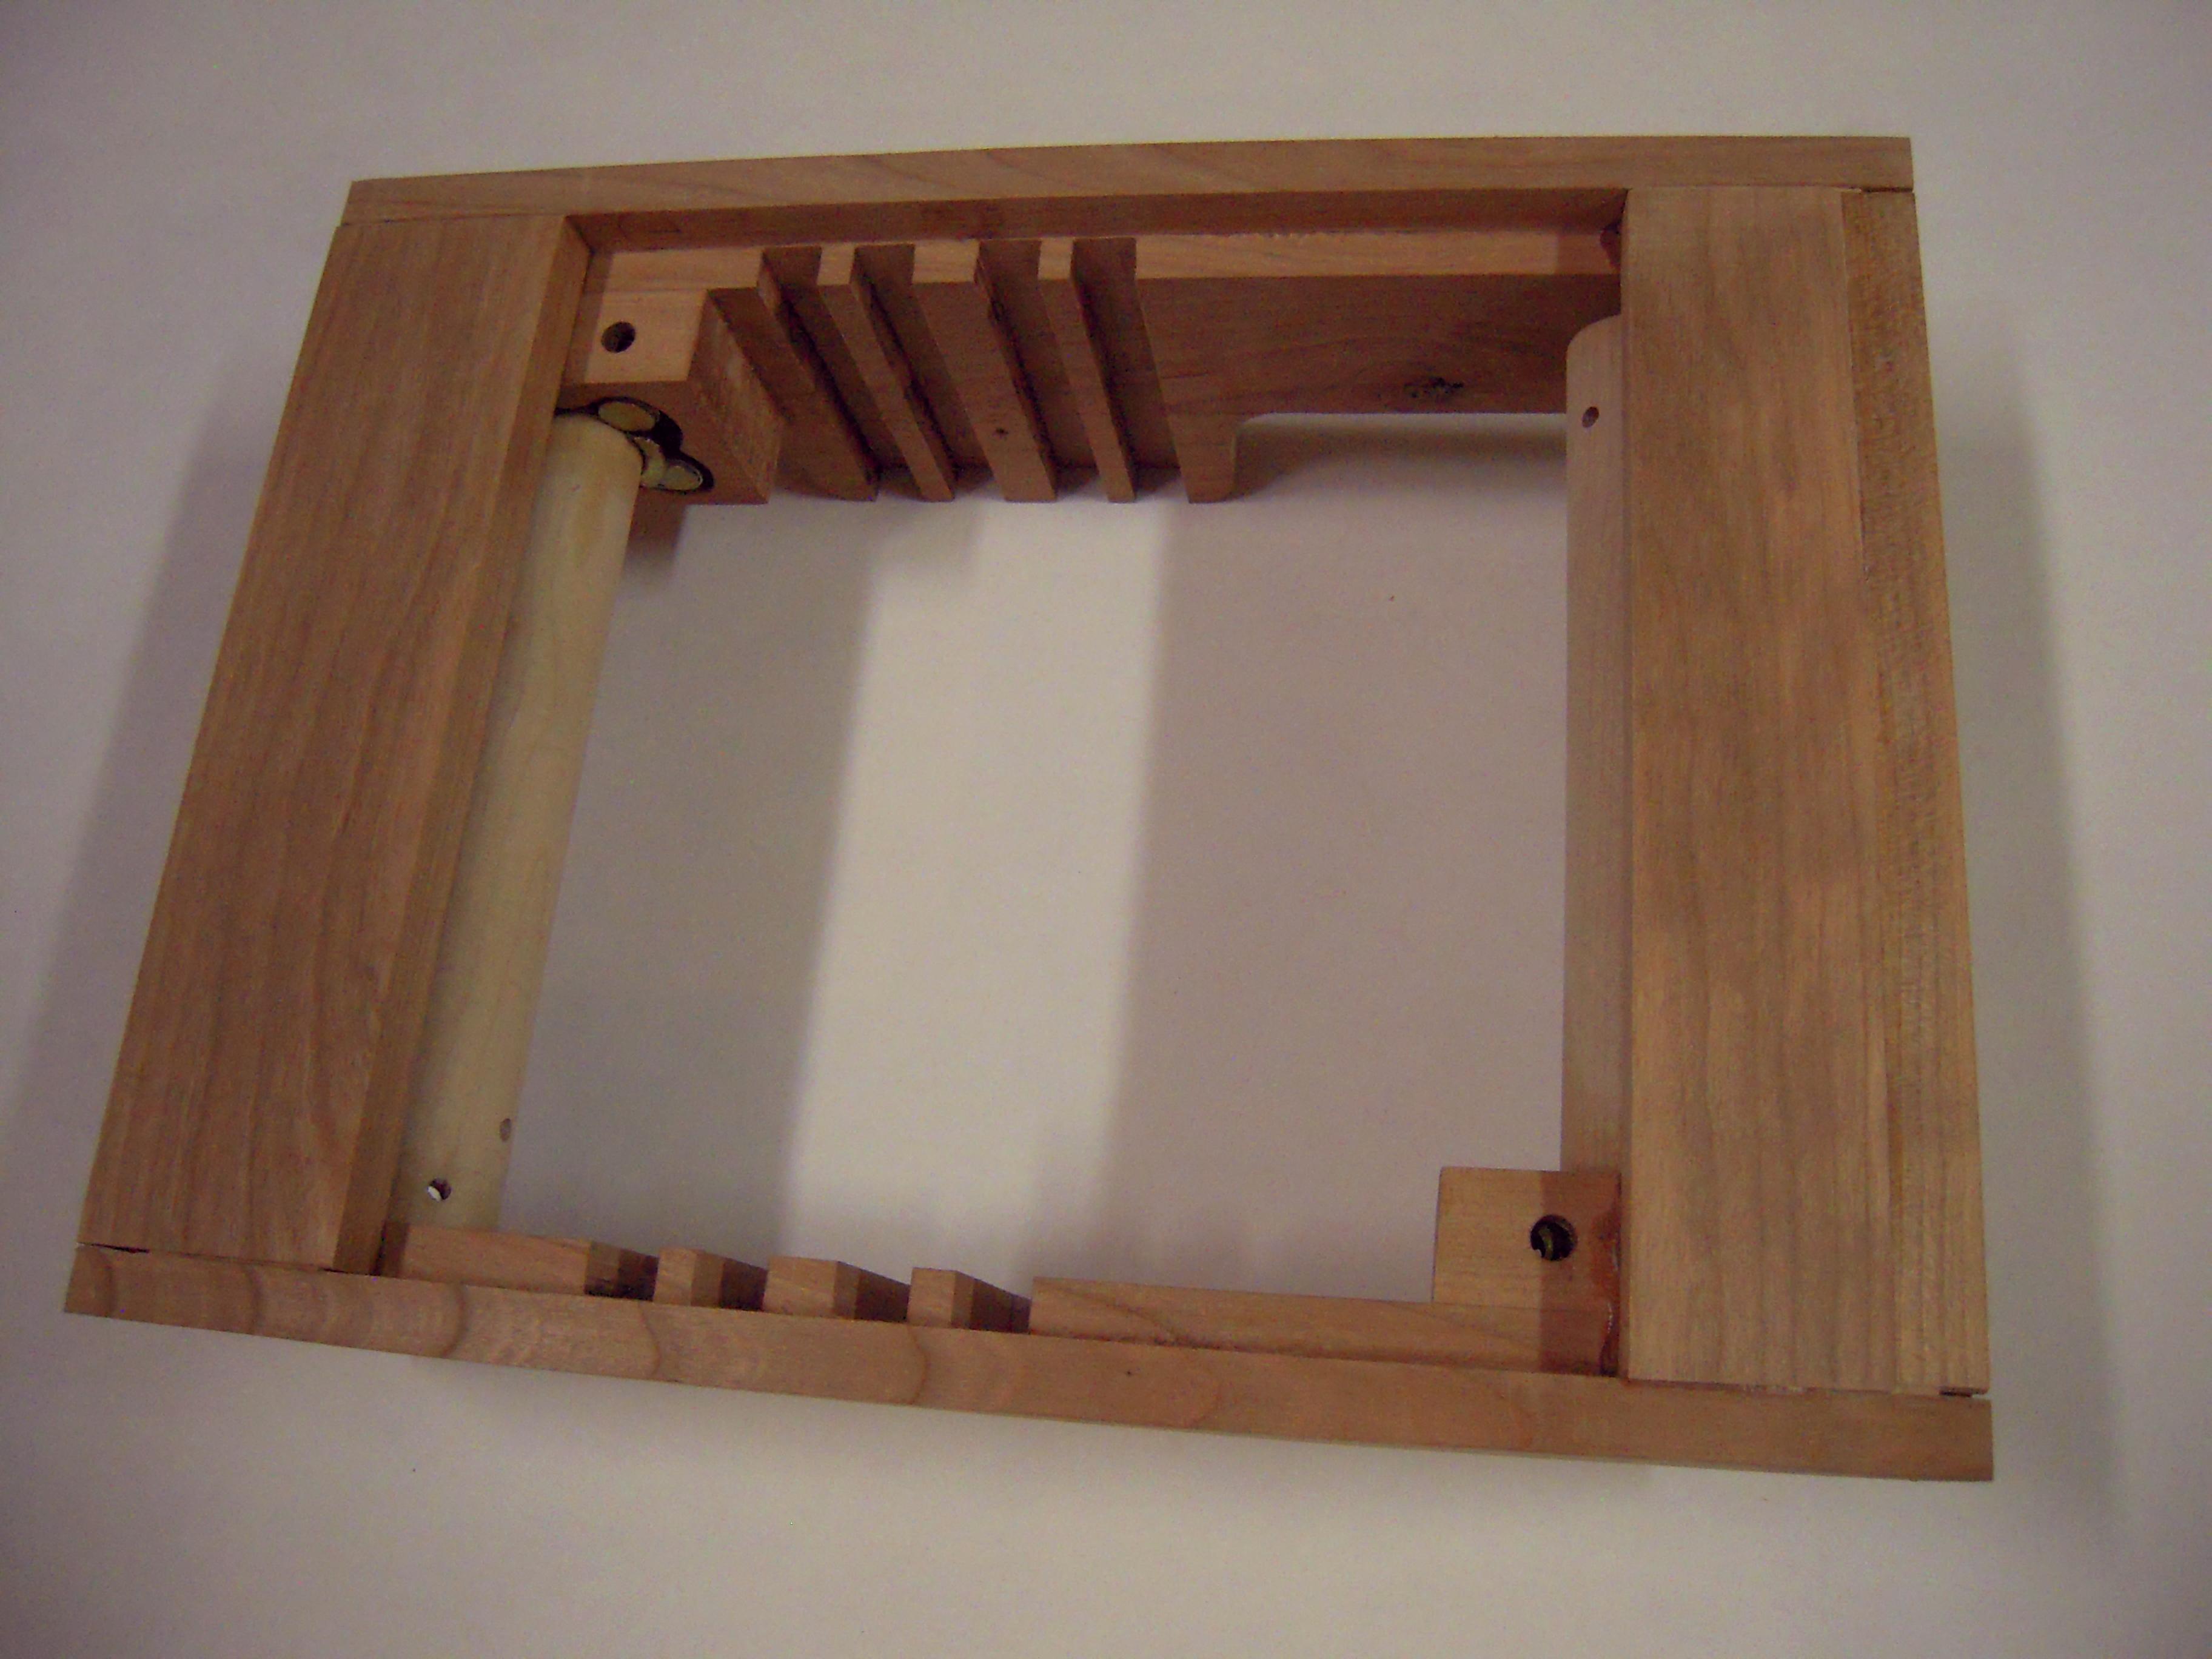
4. frame bottom view
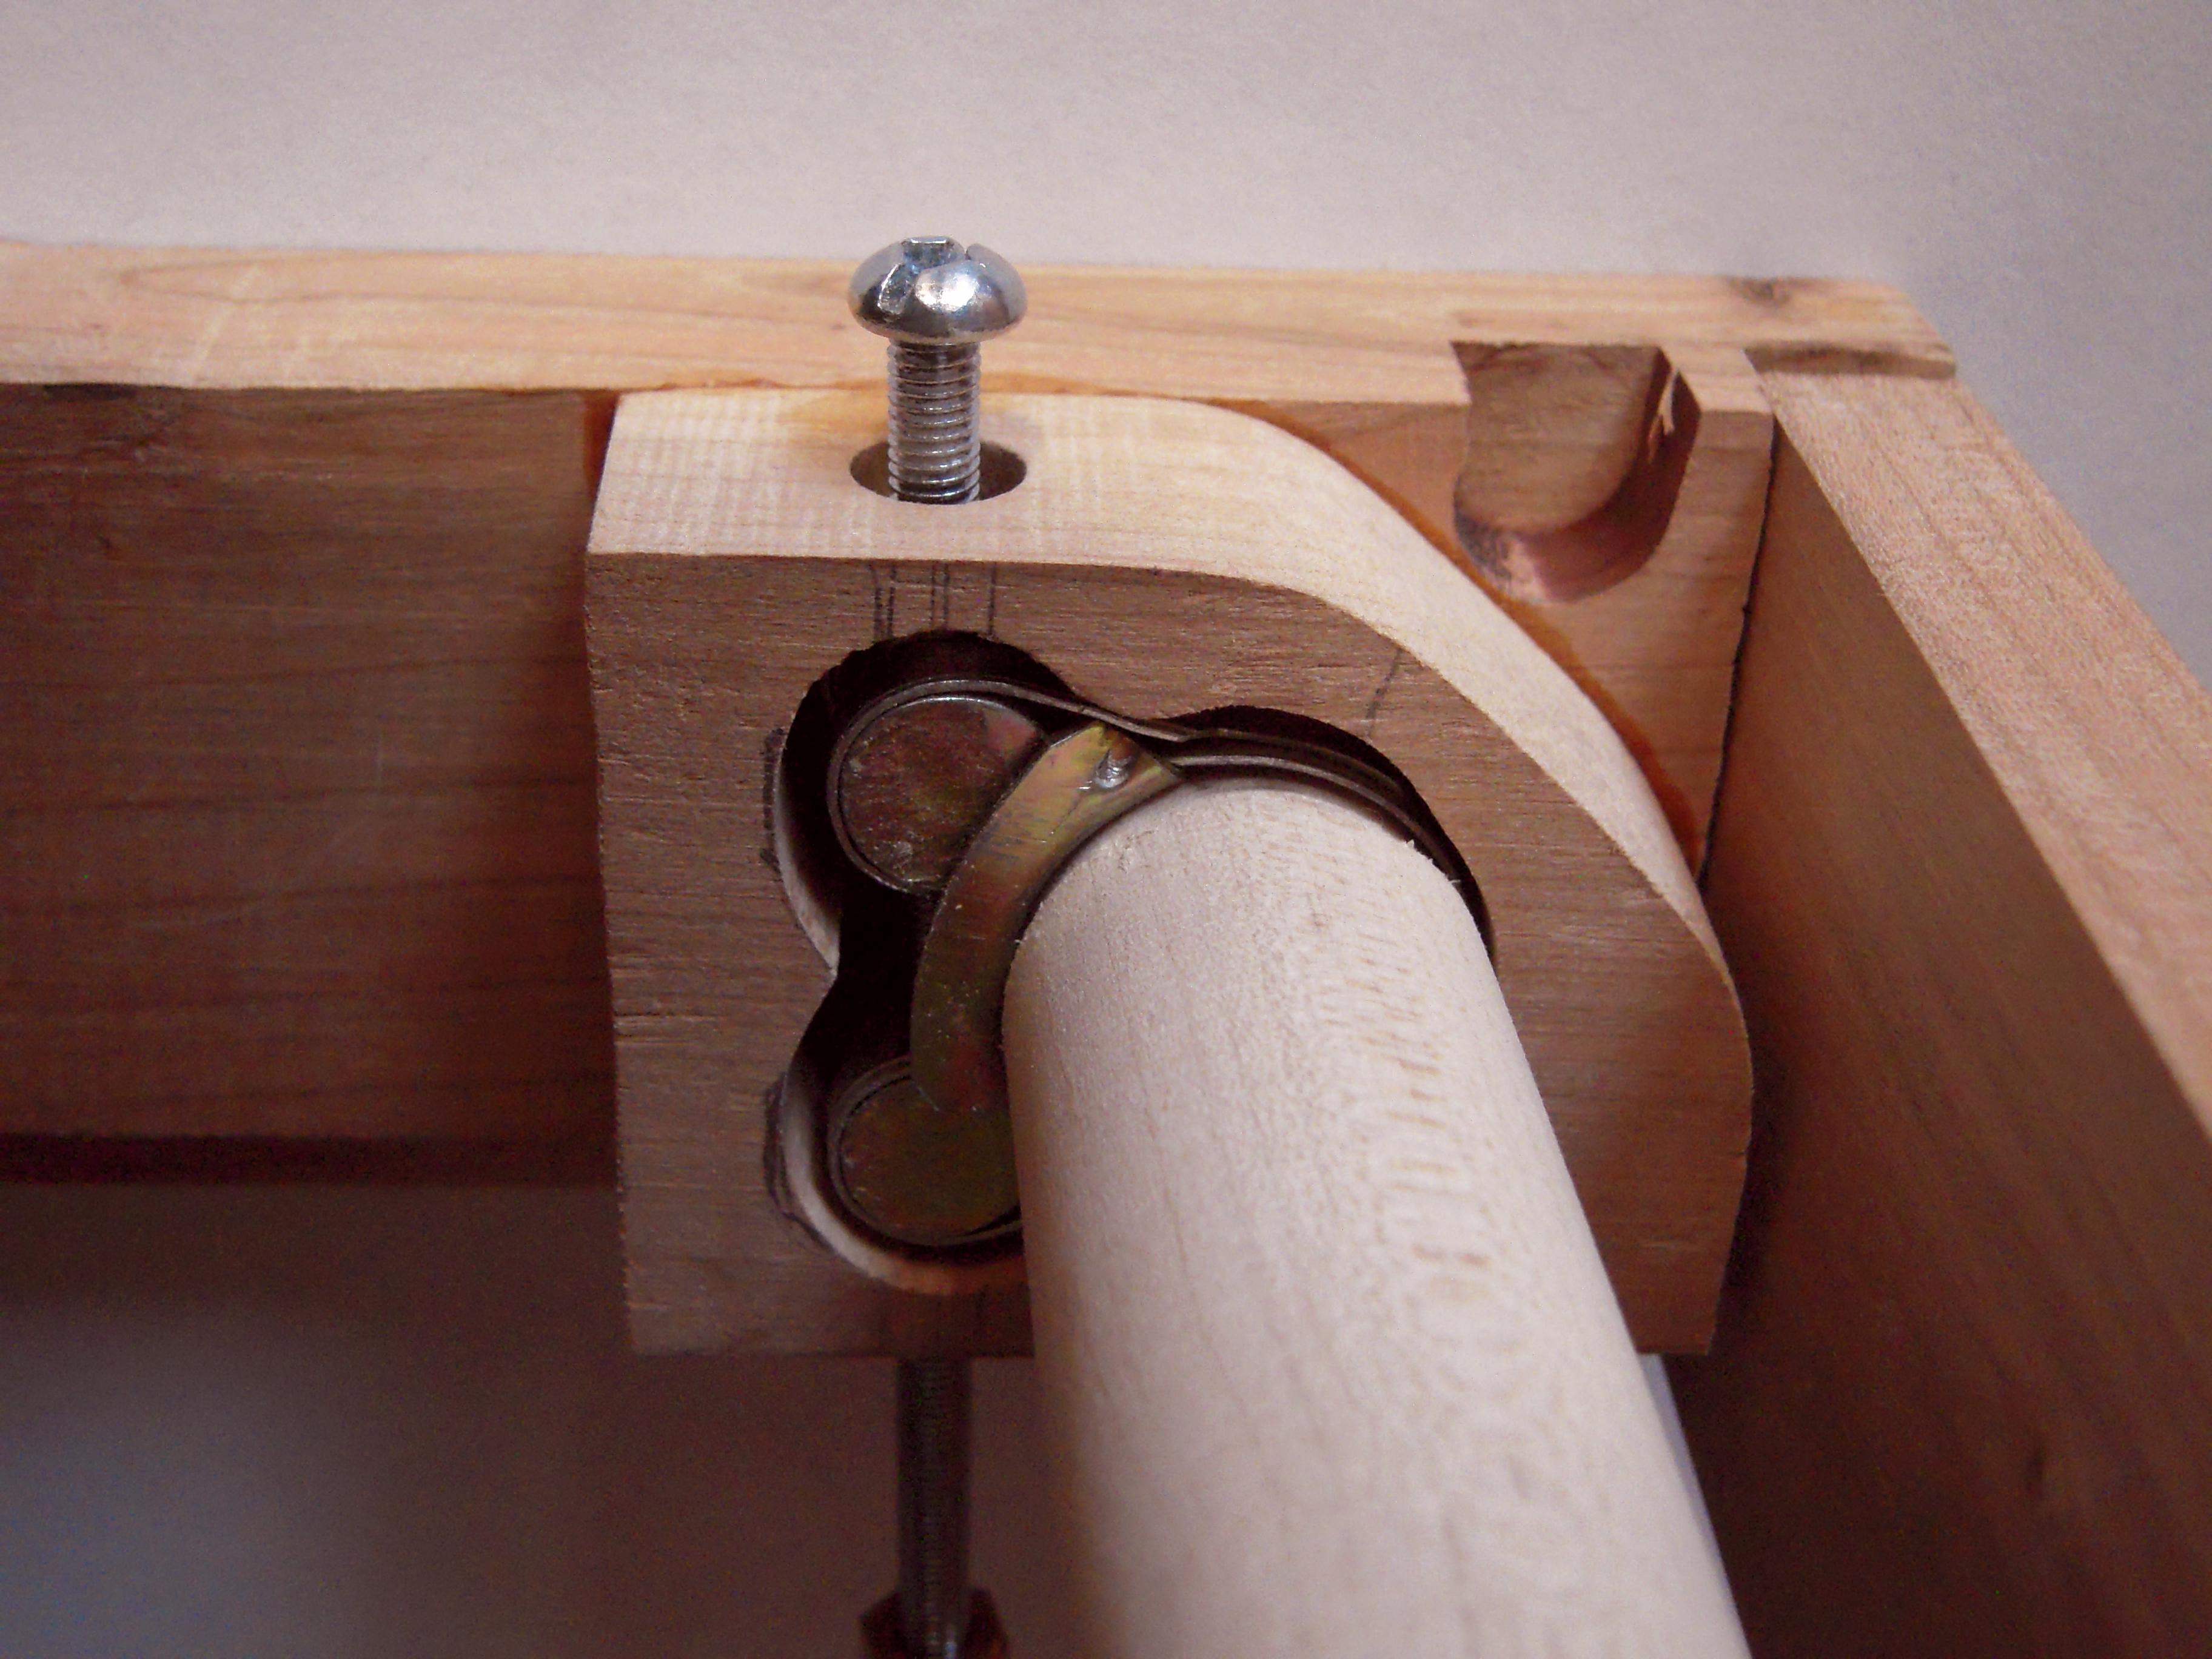
5. roller clamp holder
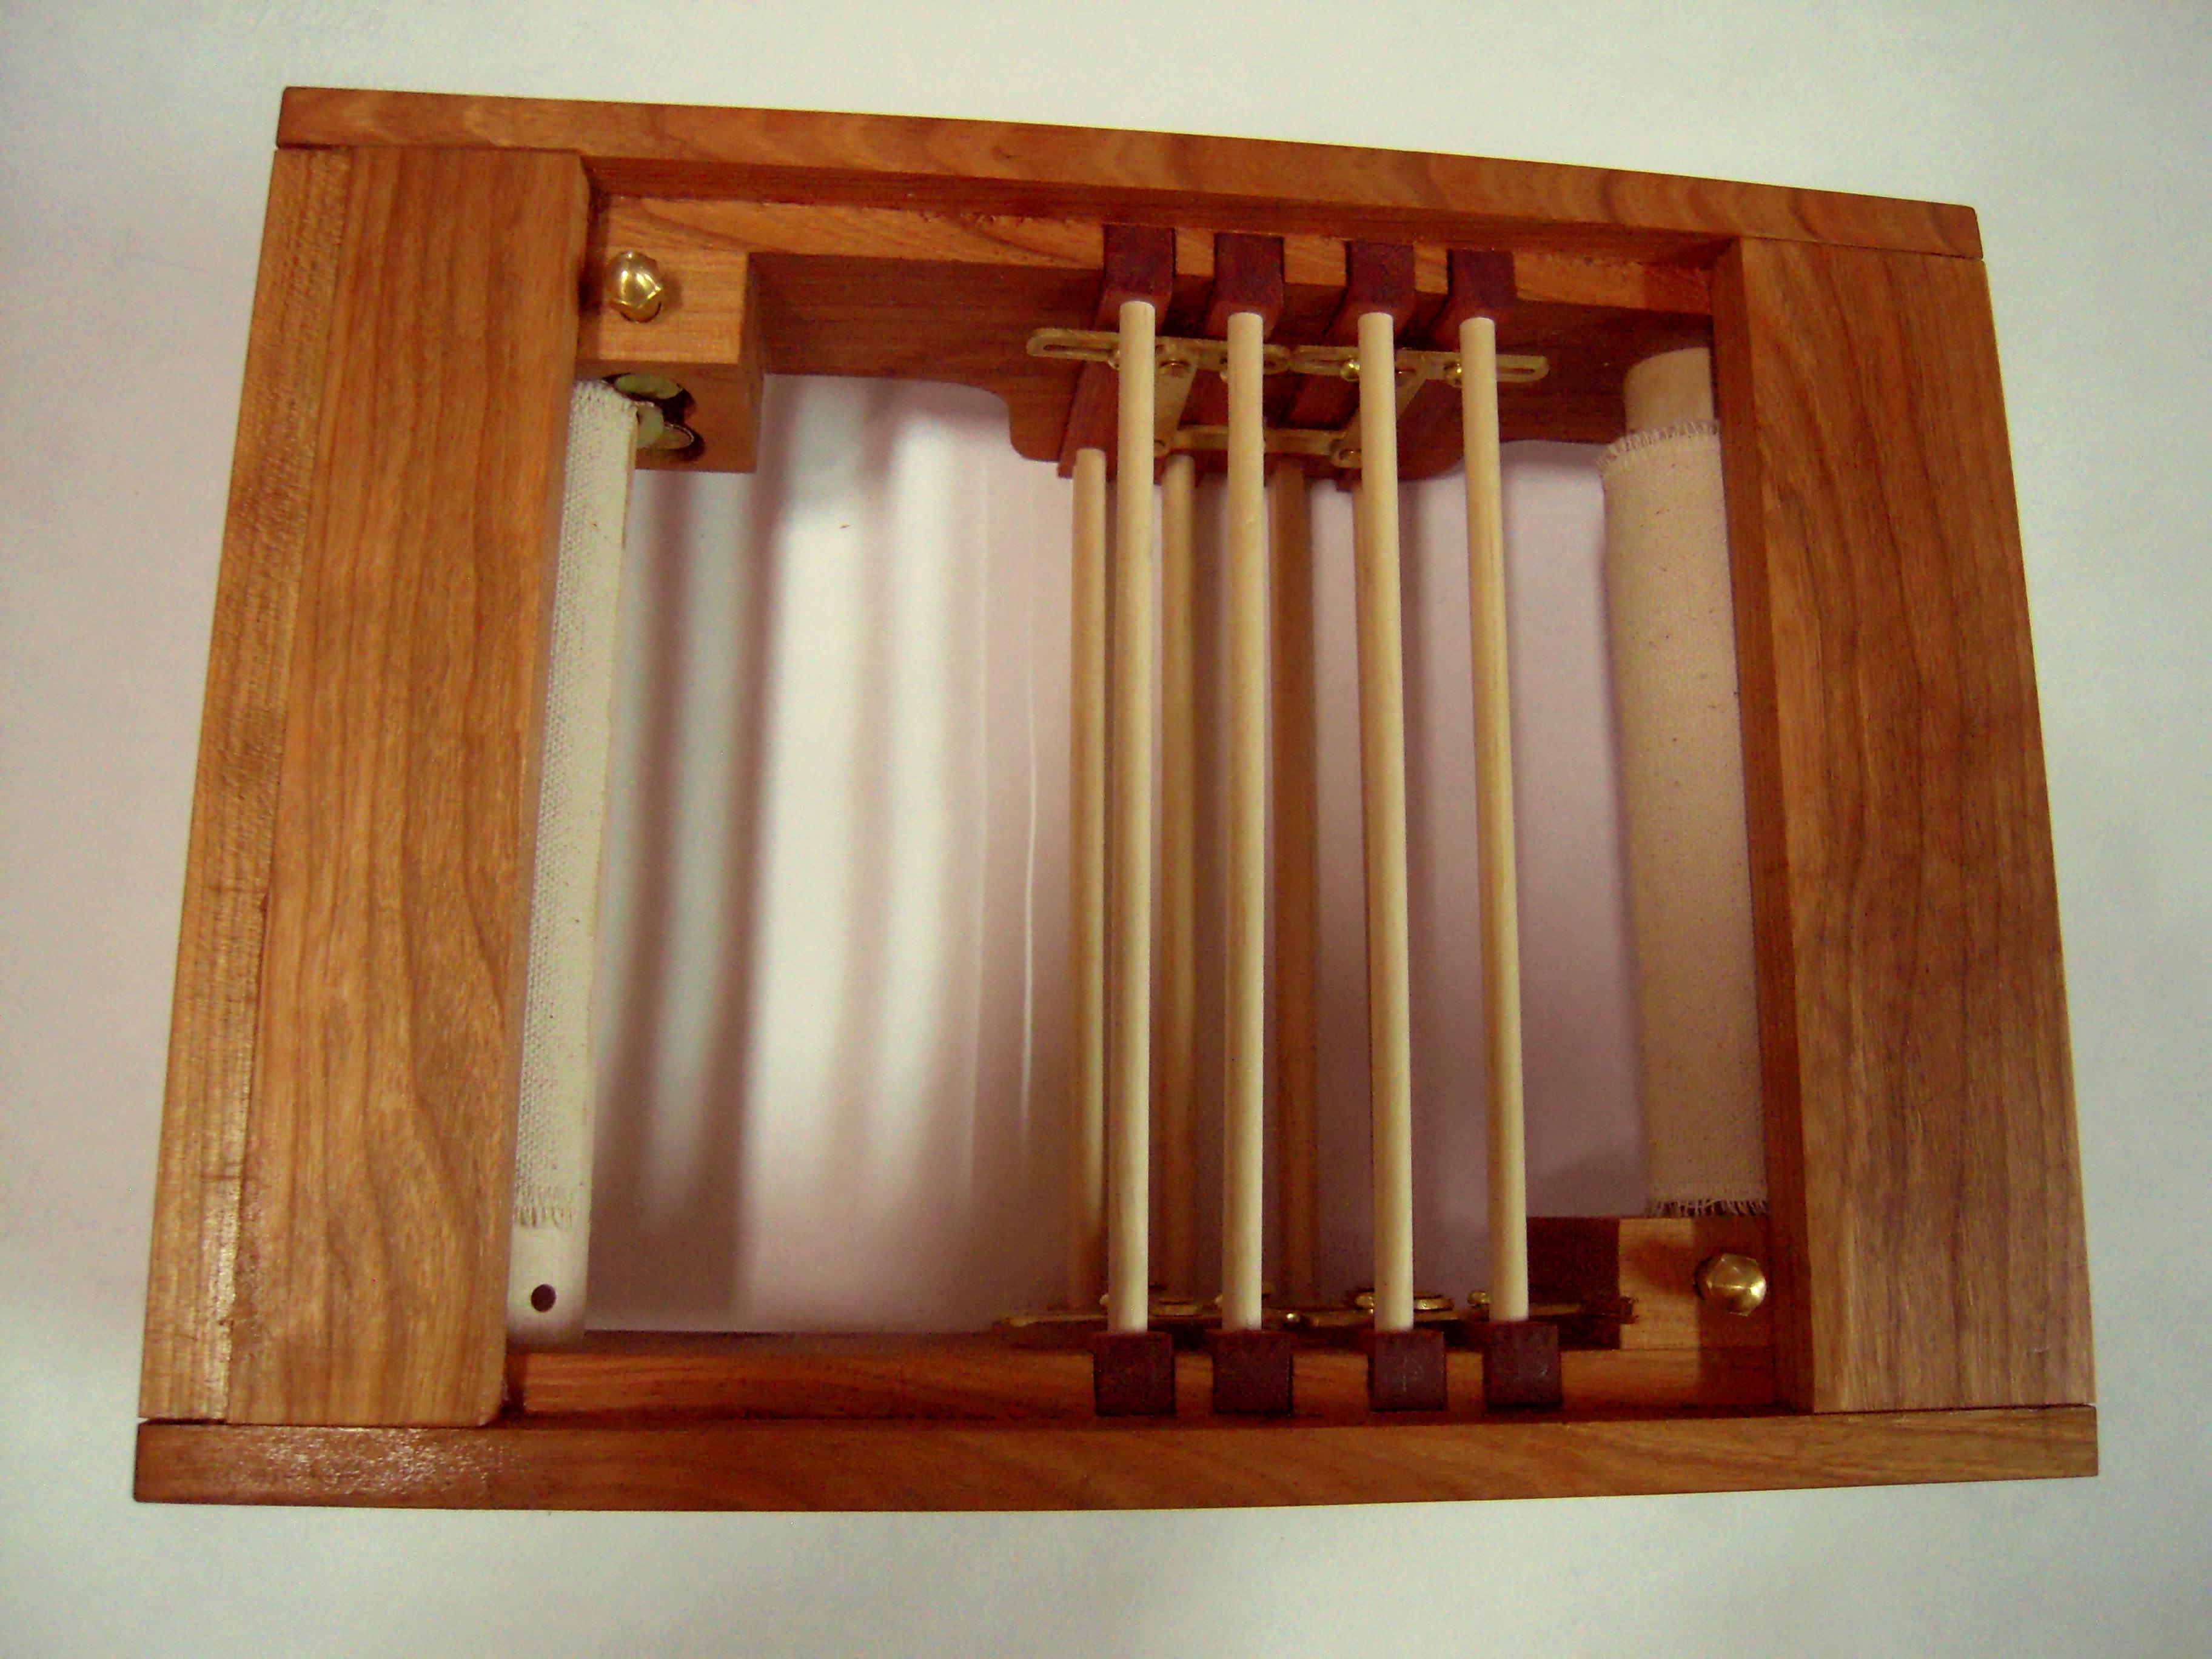
At one end of each roller is a pipe clamp held in an elaborate wood bracket glued to the side panel, to grip the roller tightly in any position. At the other end of the roller is a series of holes for inserting a lever to advance and tension the warp threads. The pipe-clamp installation grew to seem overly delicate and fussy as construction proceeded – it may require improvement.
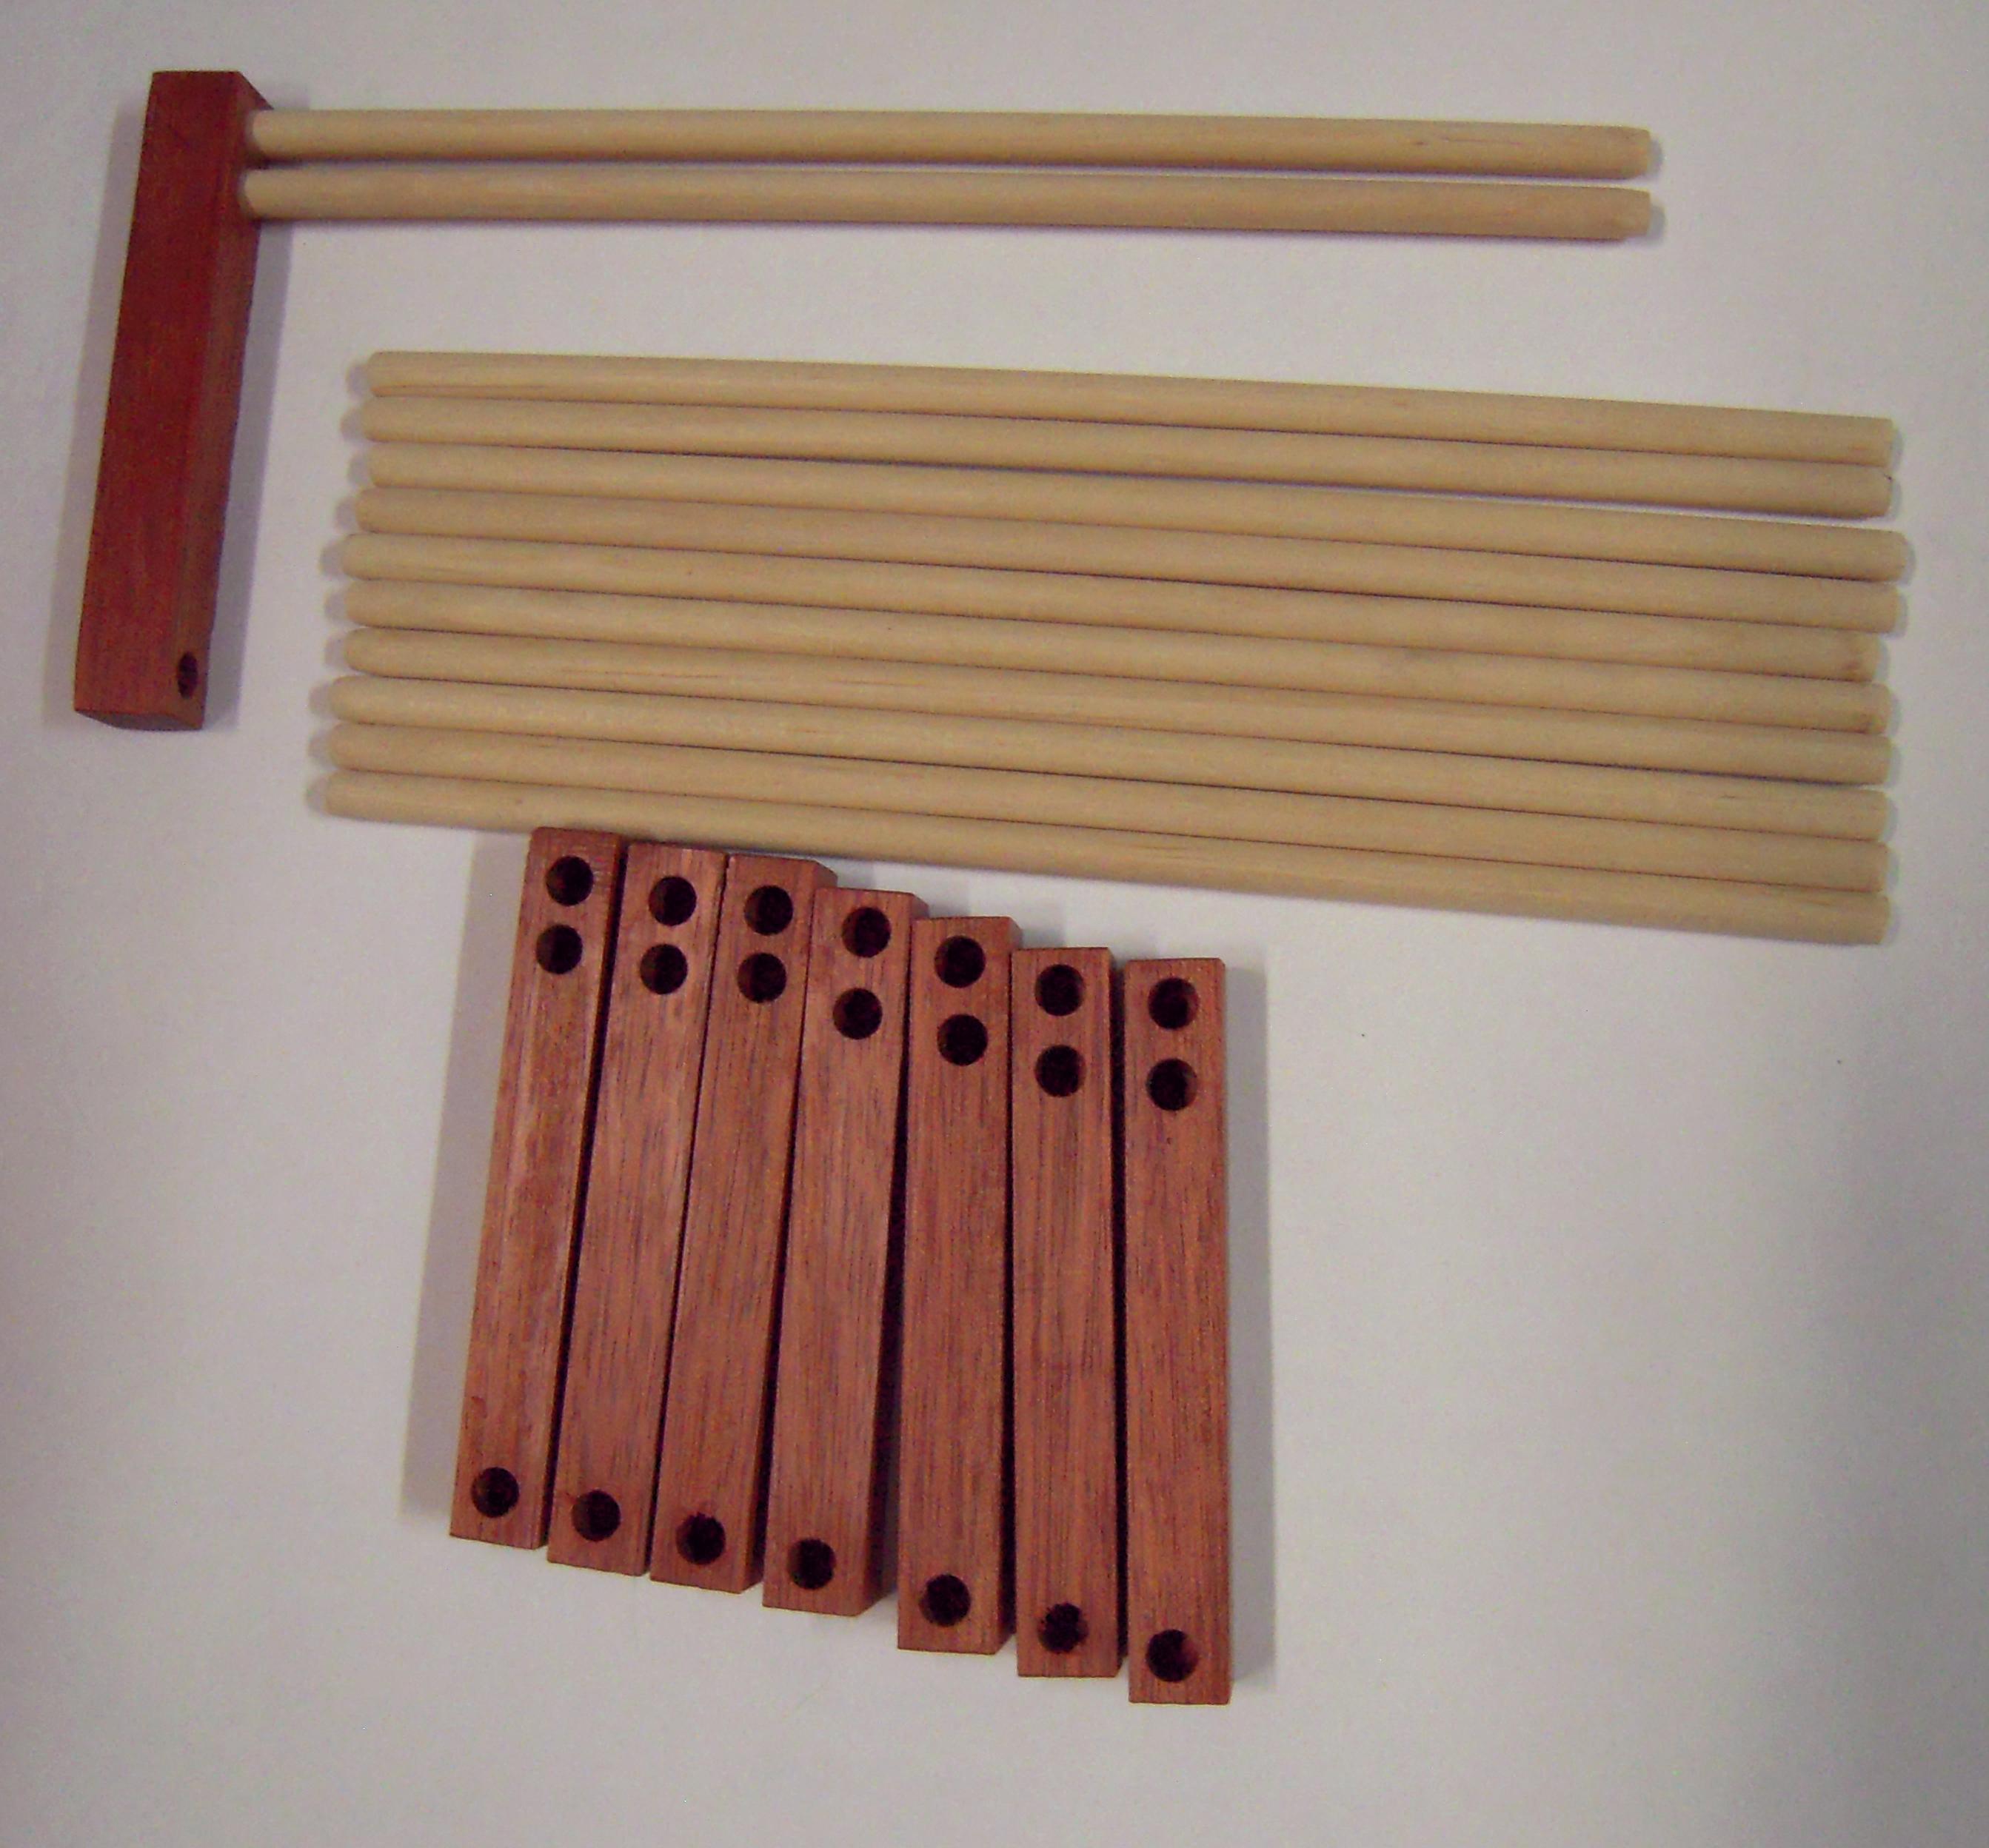
6. shaft components
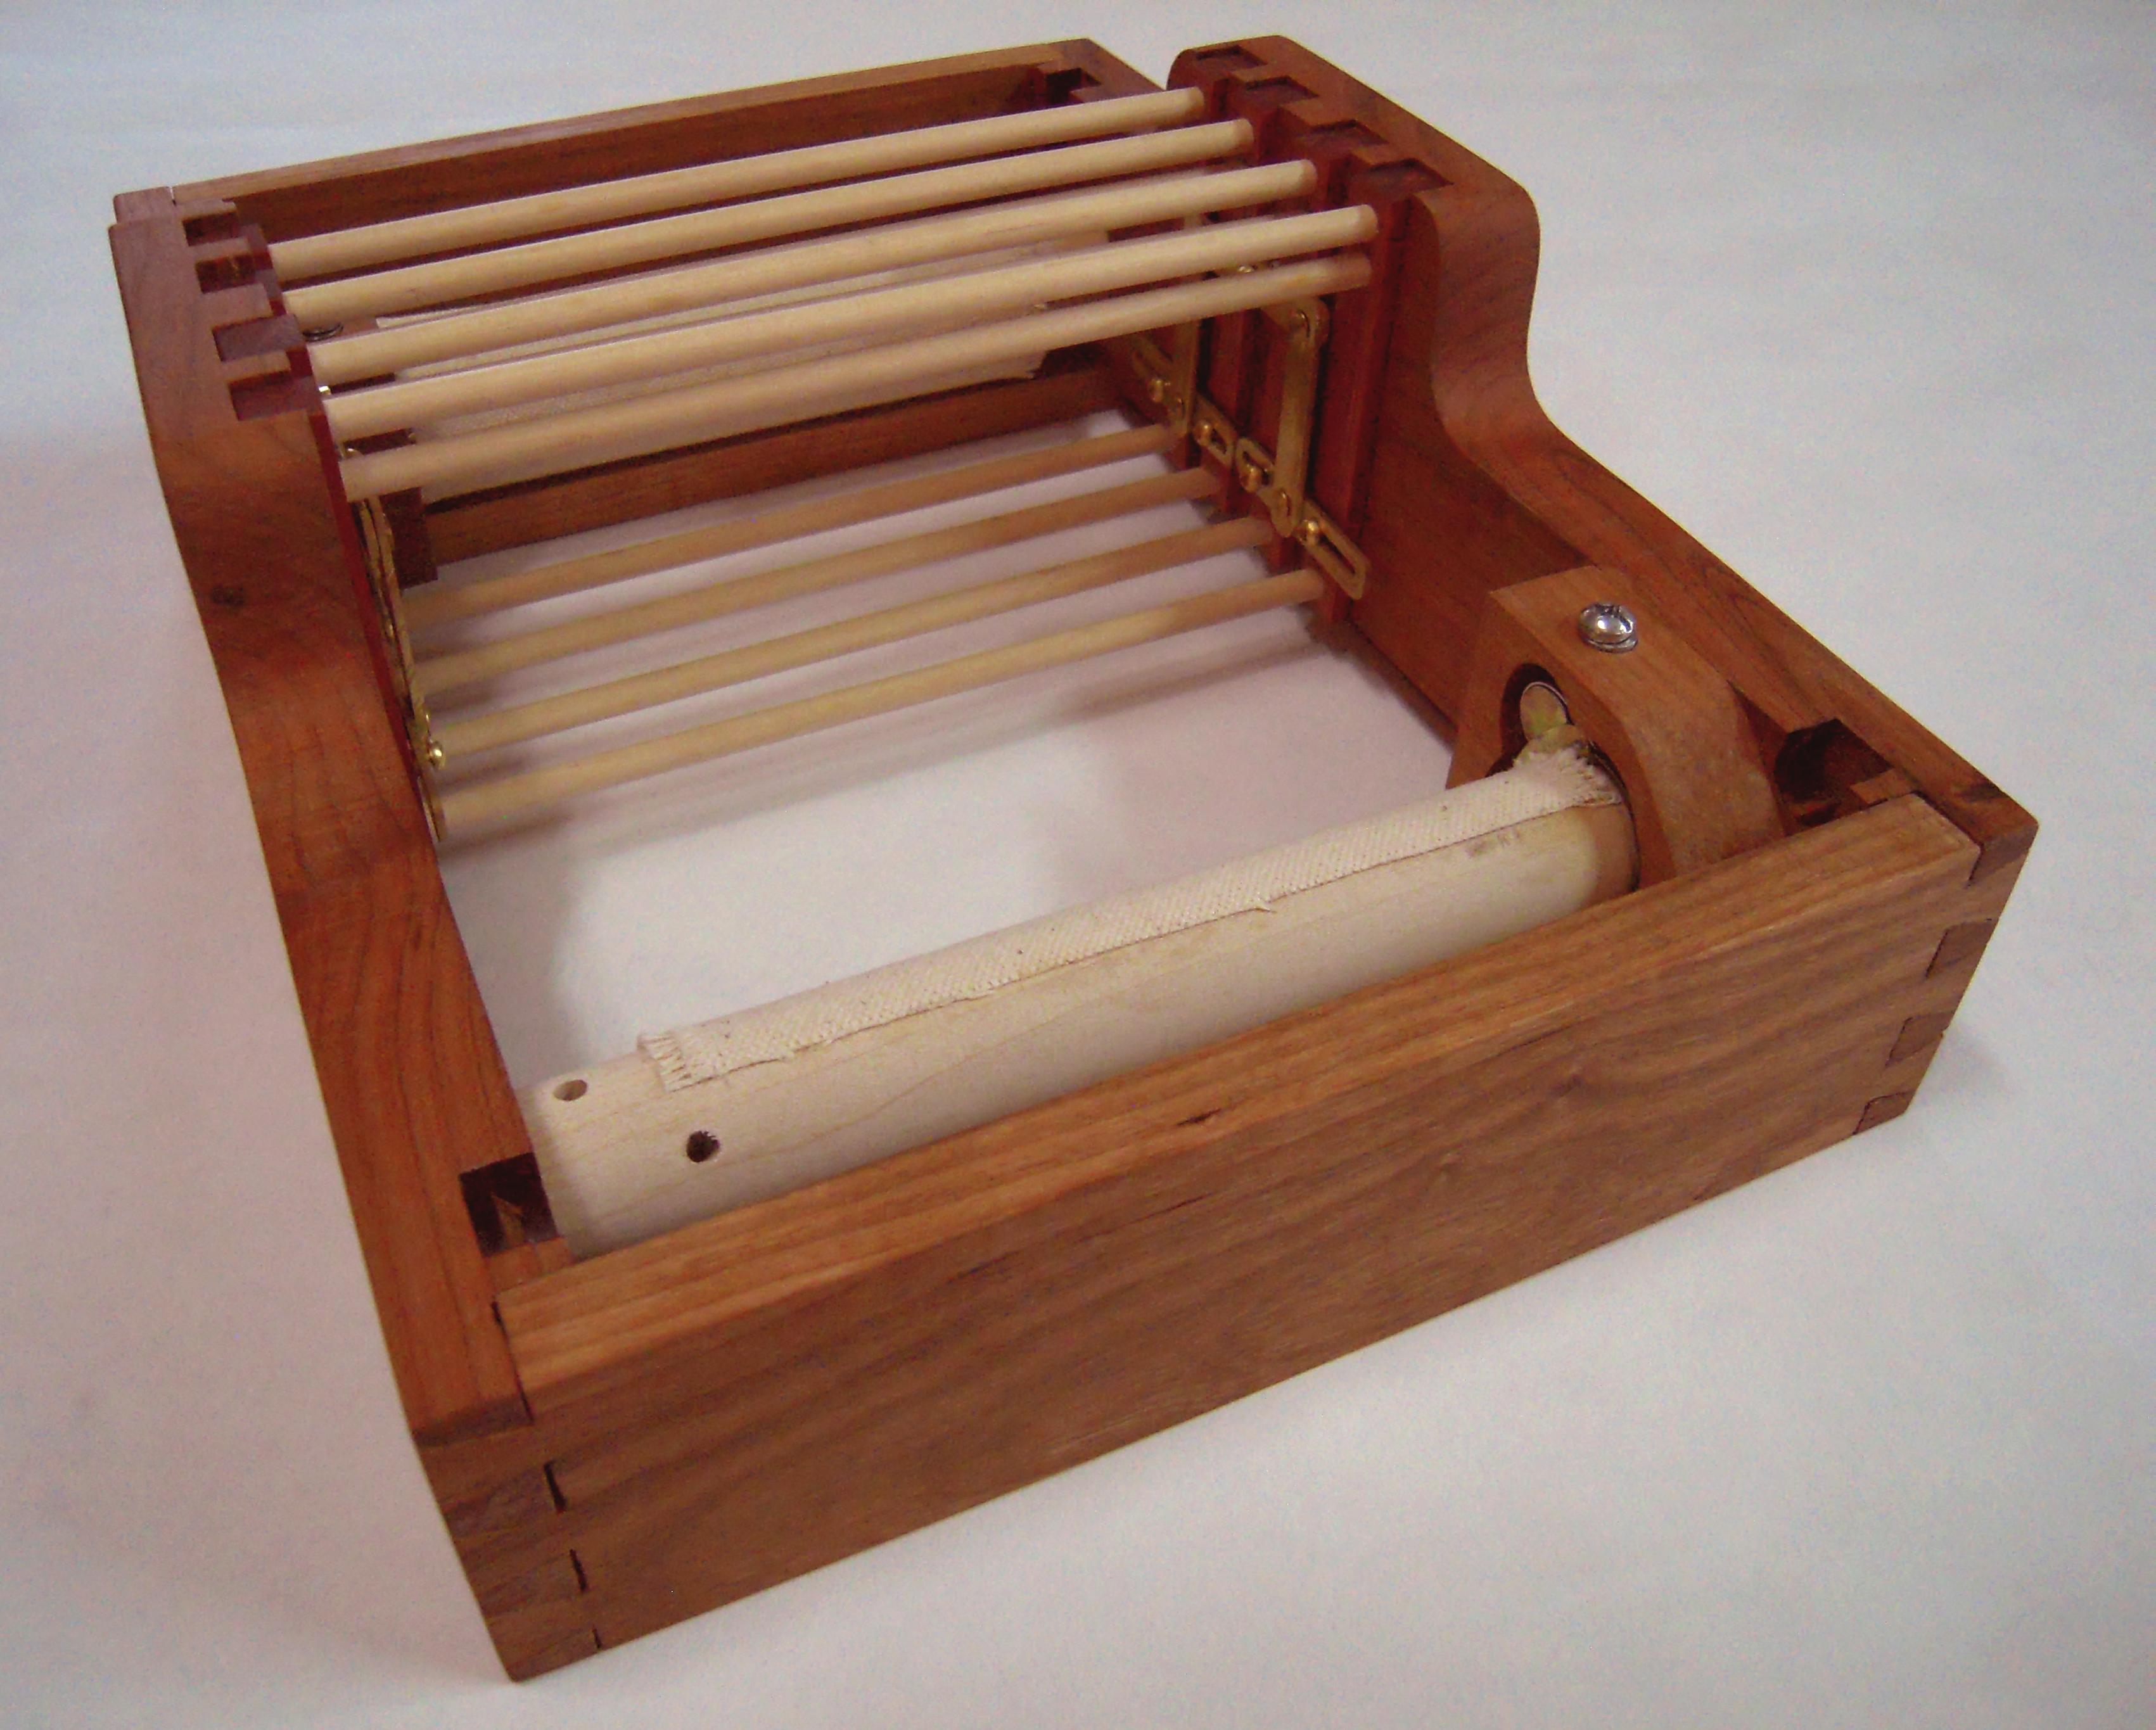
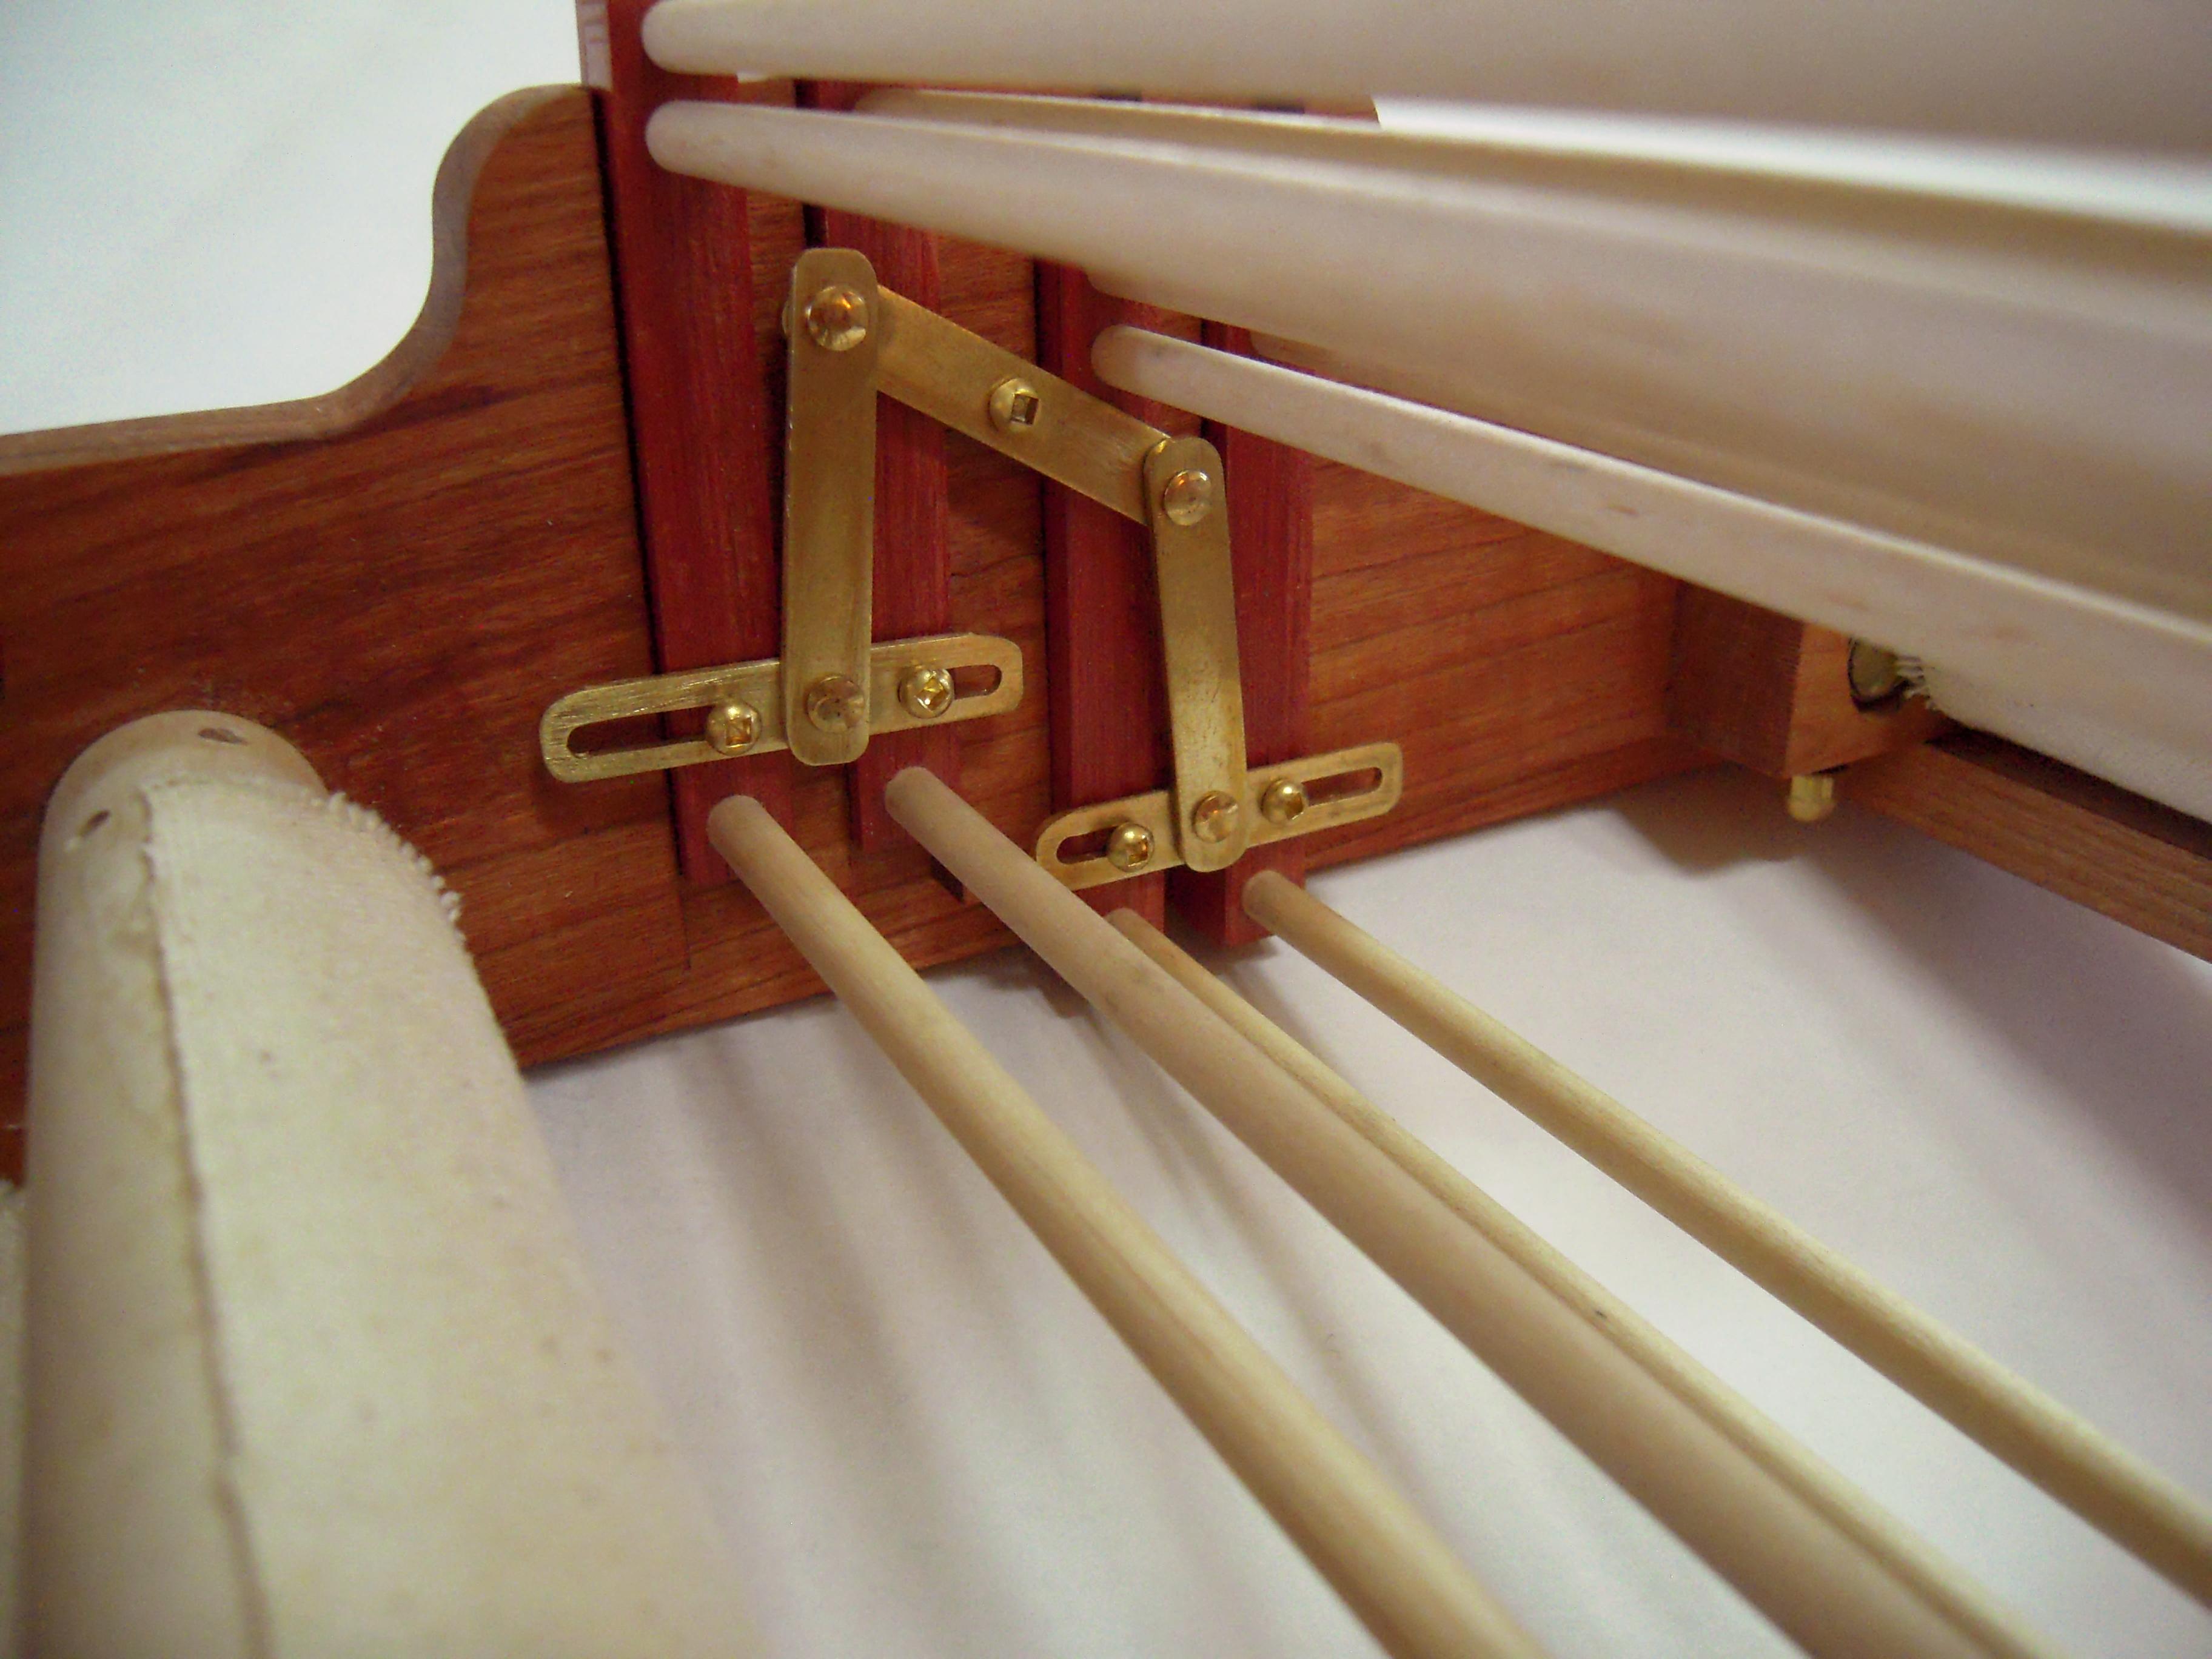
7. frame and harness assembly
8. harness assembly in place
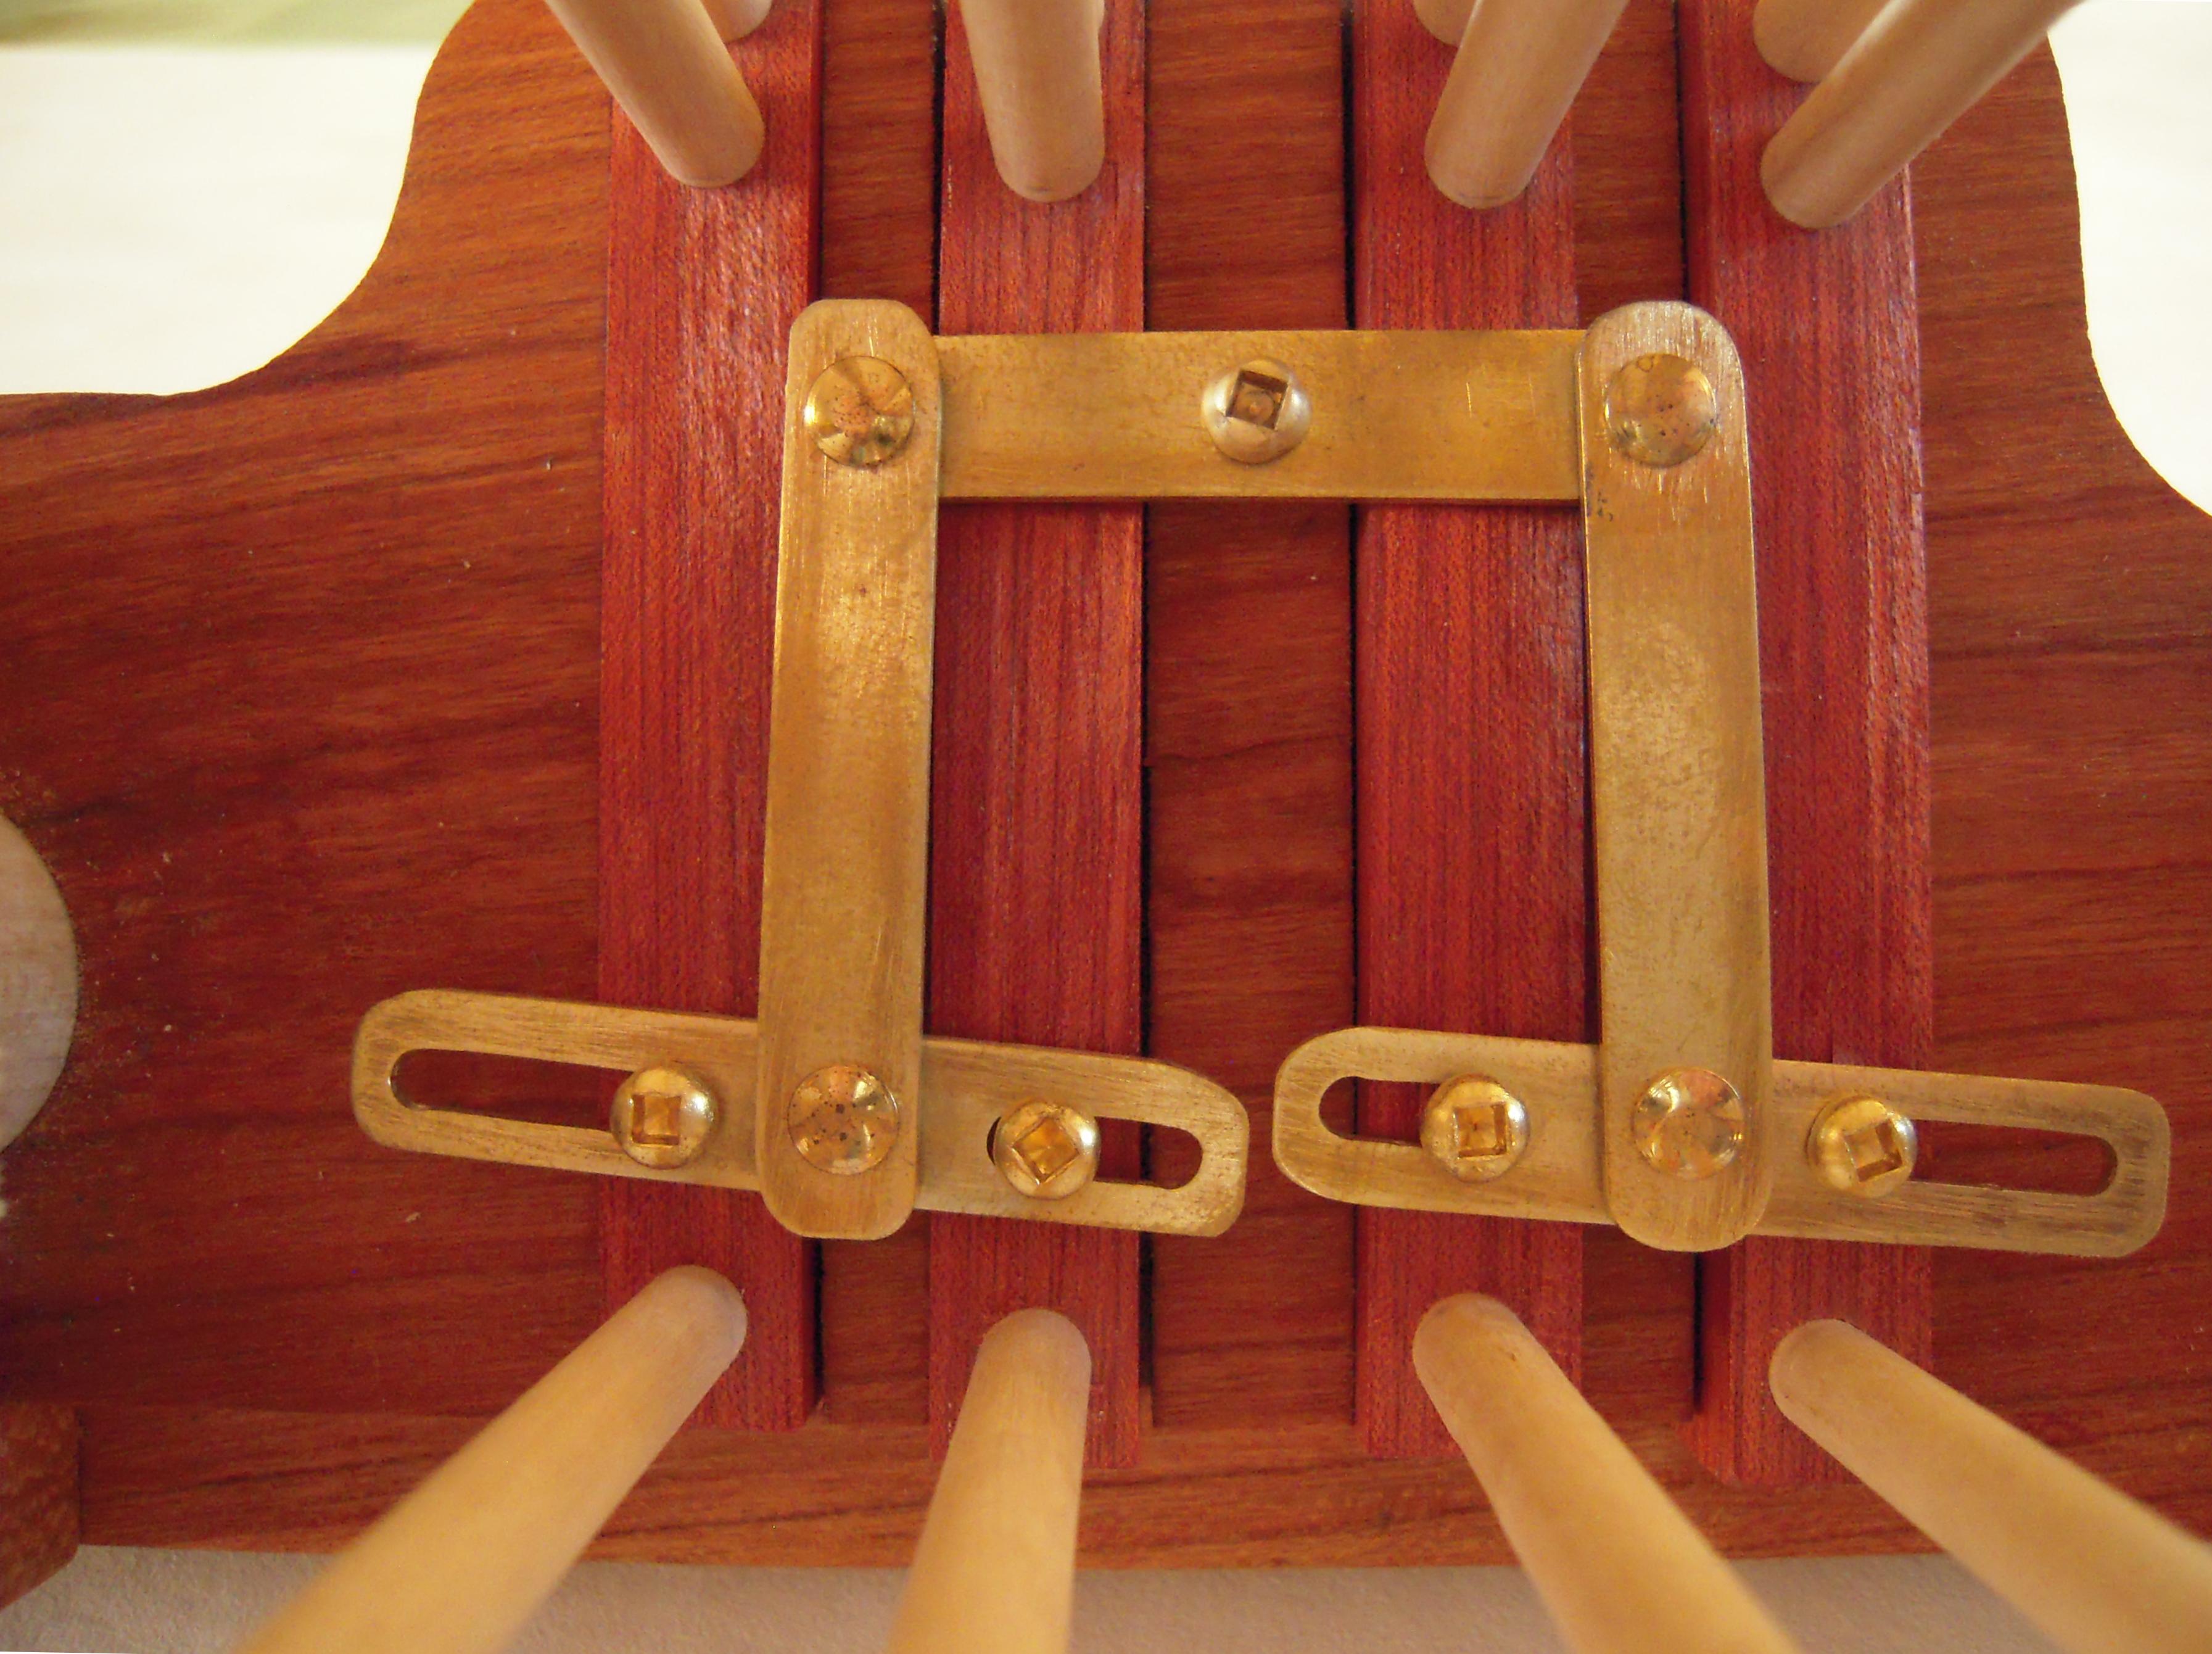
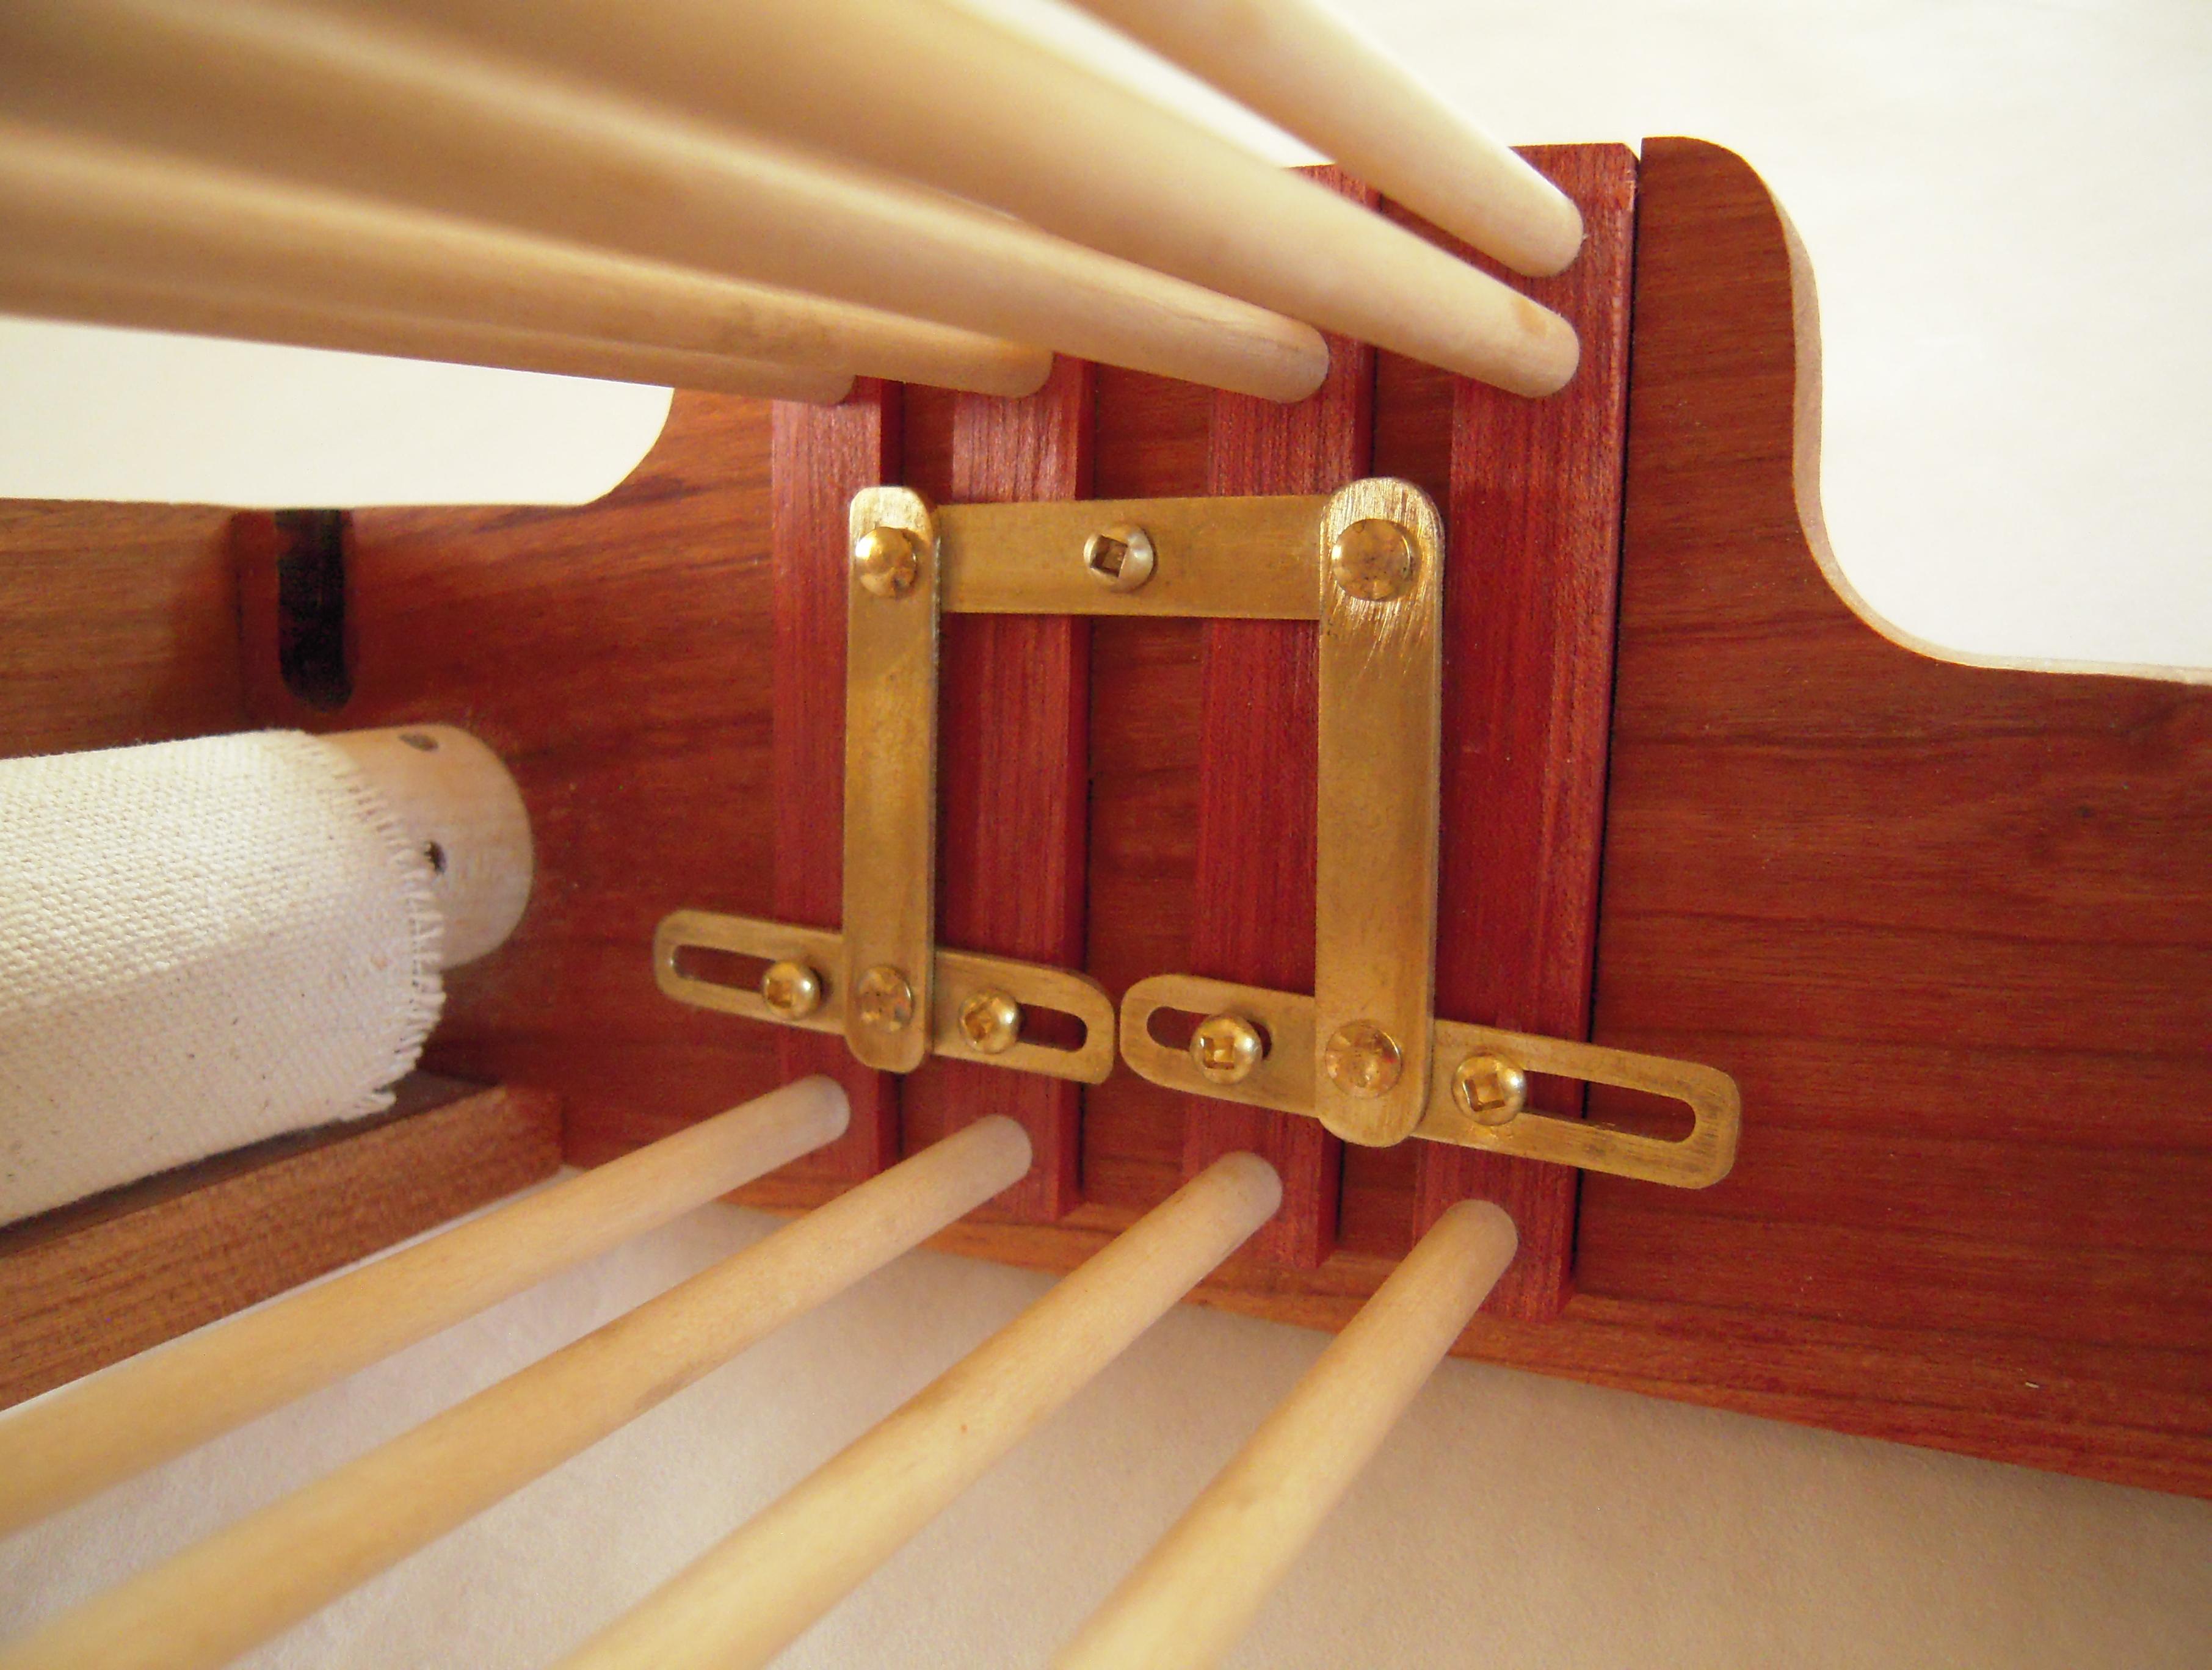
9. harness assembly closeup
11. harness action
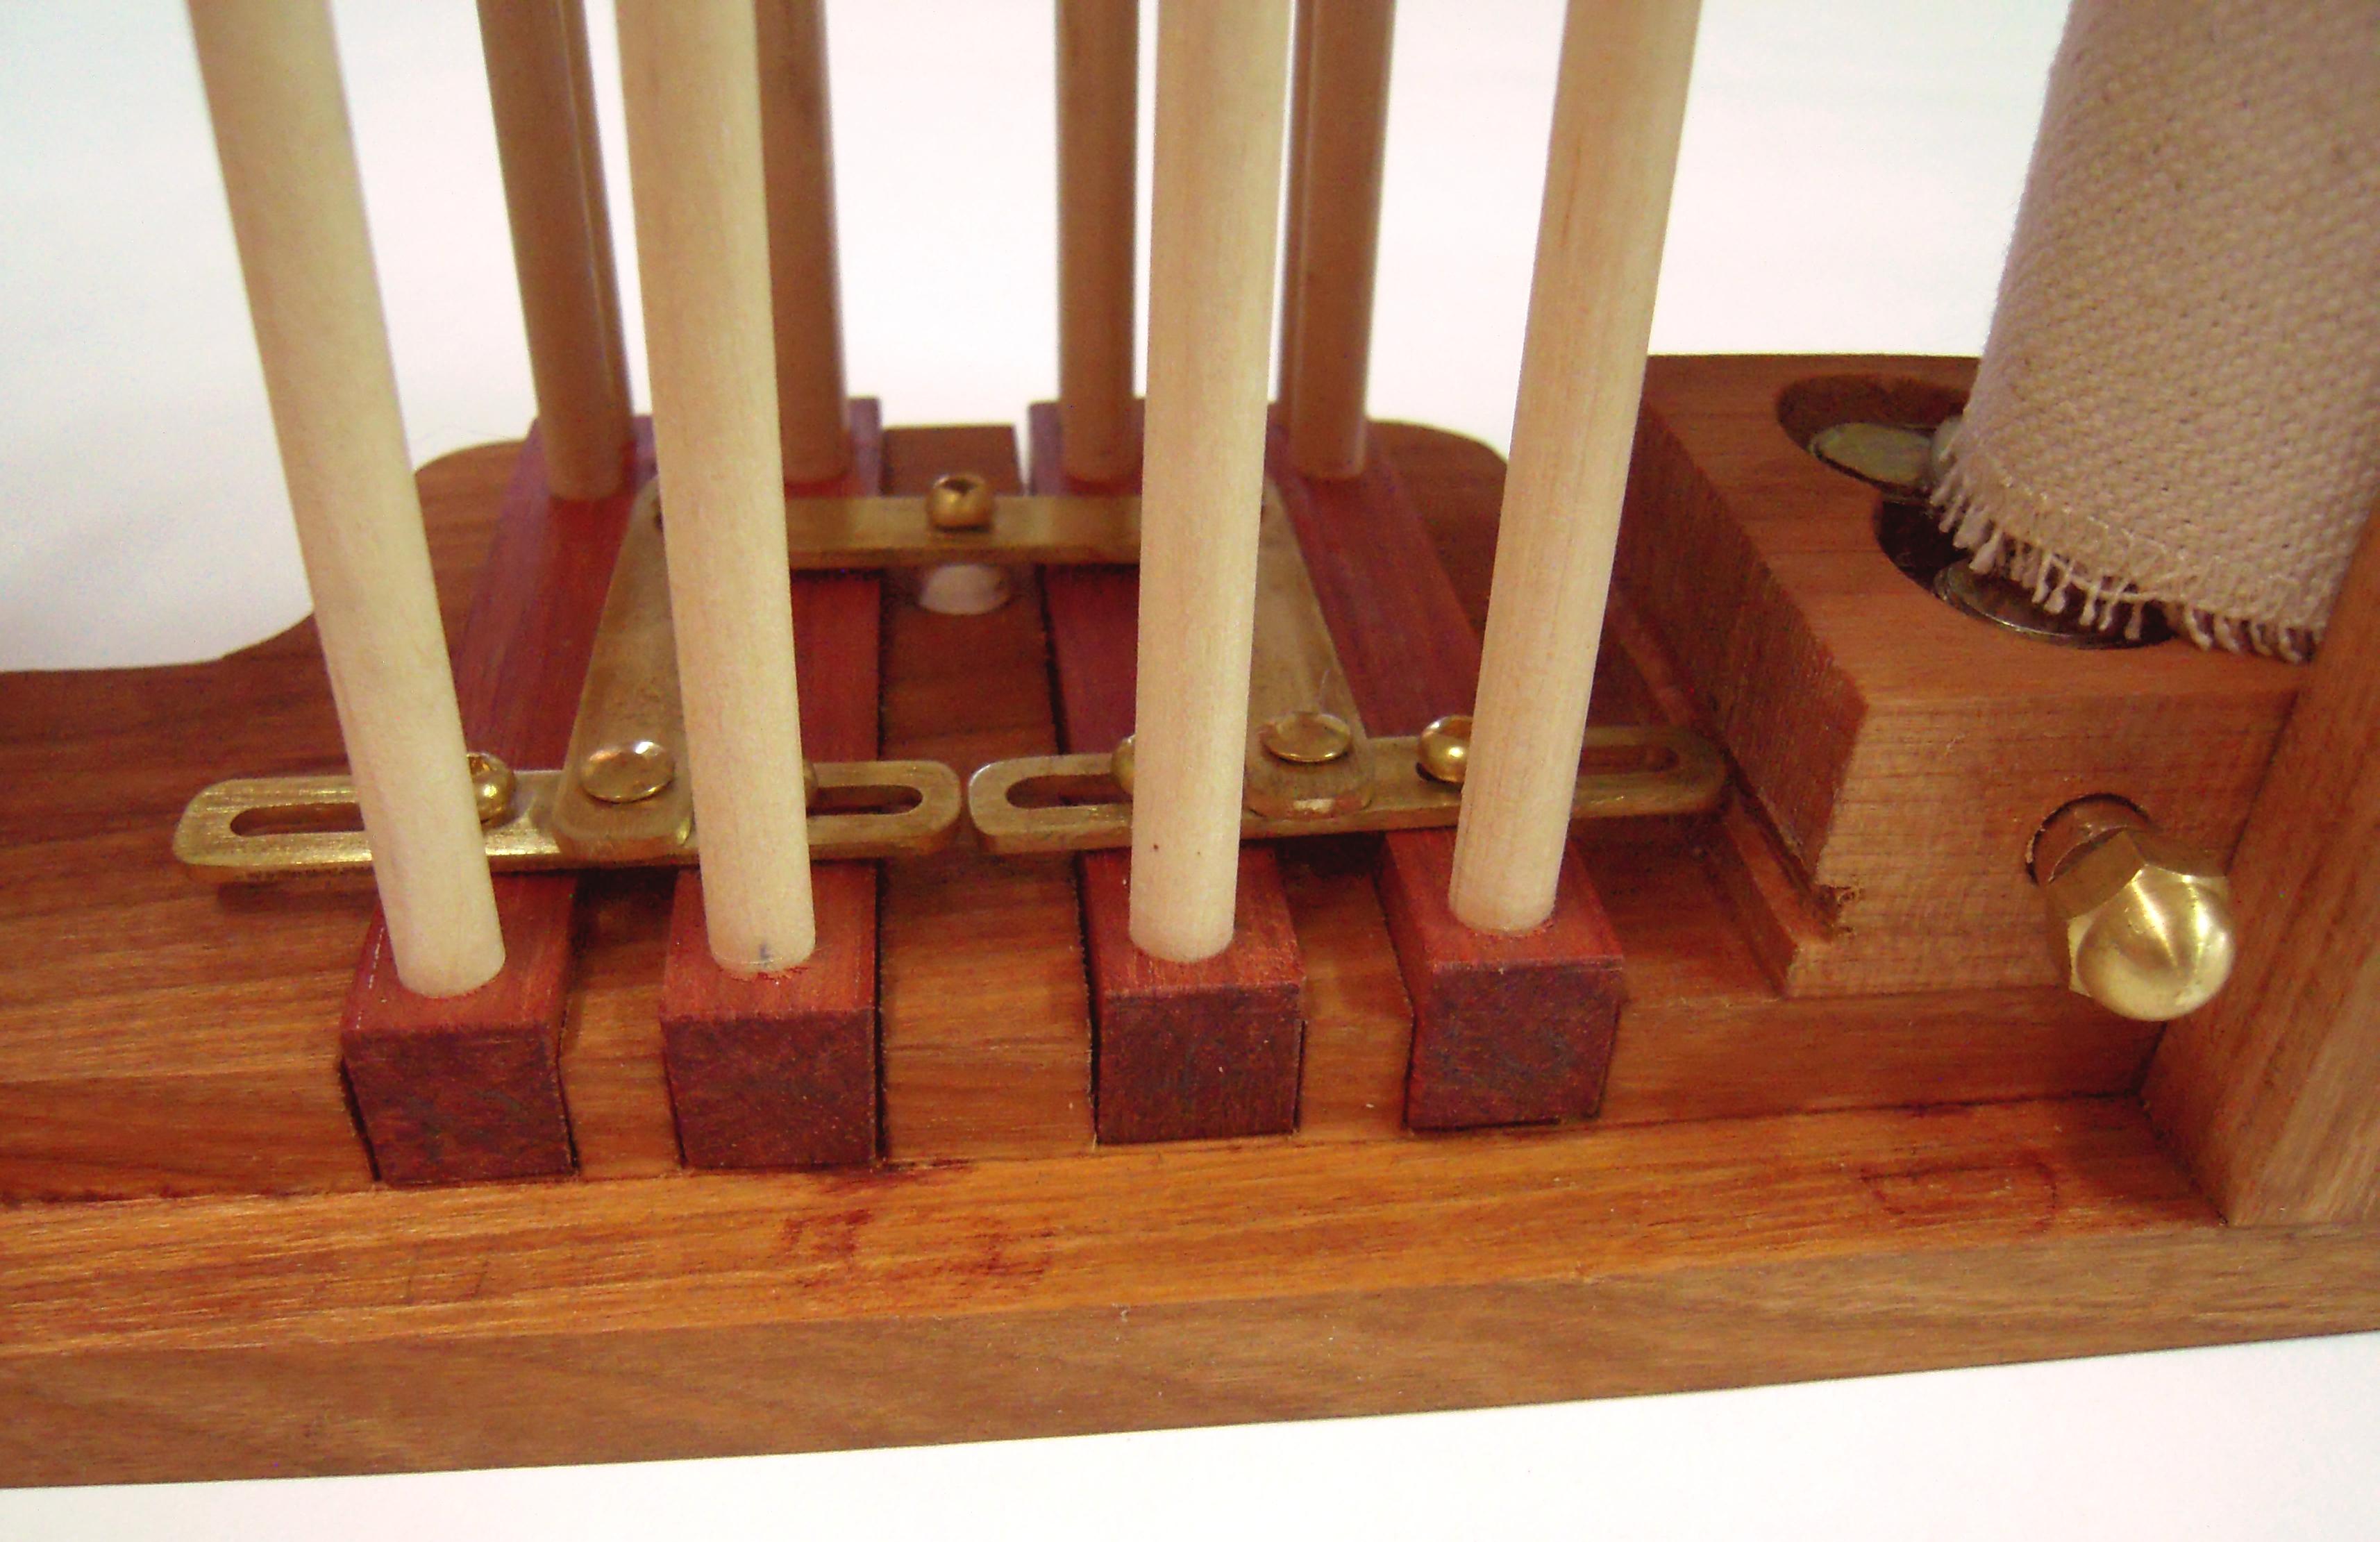
10. harness assembly bottom view
The installation of the shafts and their connecting mechanism needed careful observation and trimming to ensure smooth movement in their tracks. The features of the design and construction are evident in these few photographs – more photos are available on request. Note there is no provision for a reed and beater – because the warp will be only about 5 inches in width, beating-up the weaving will be done with a hand-held comb.
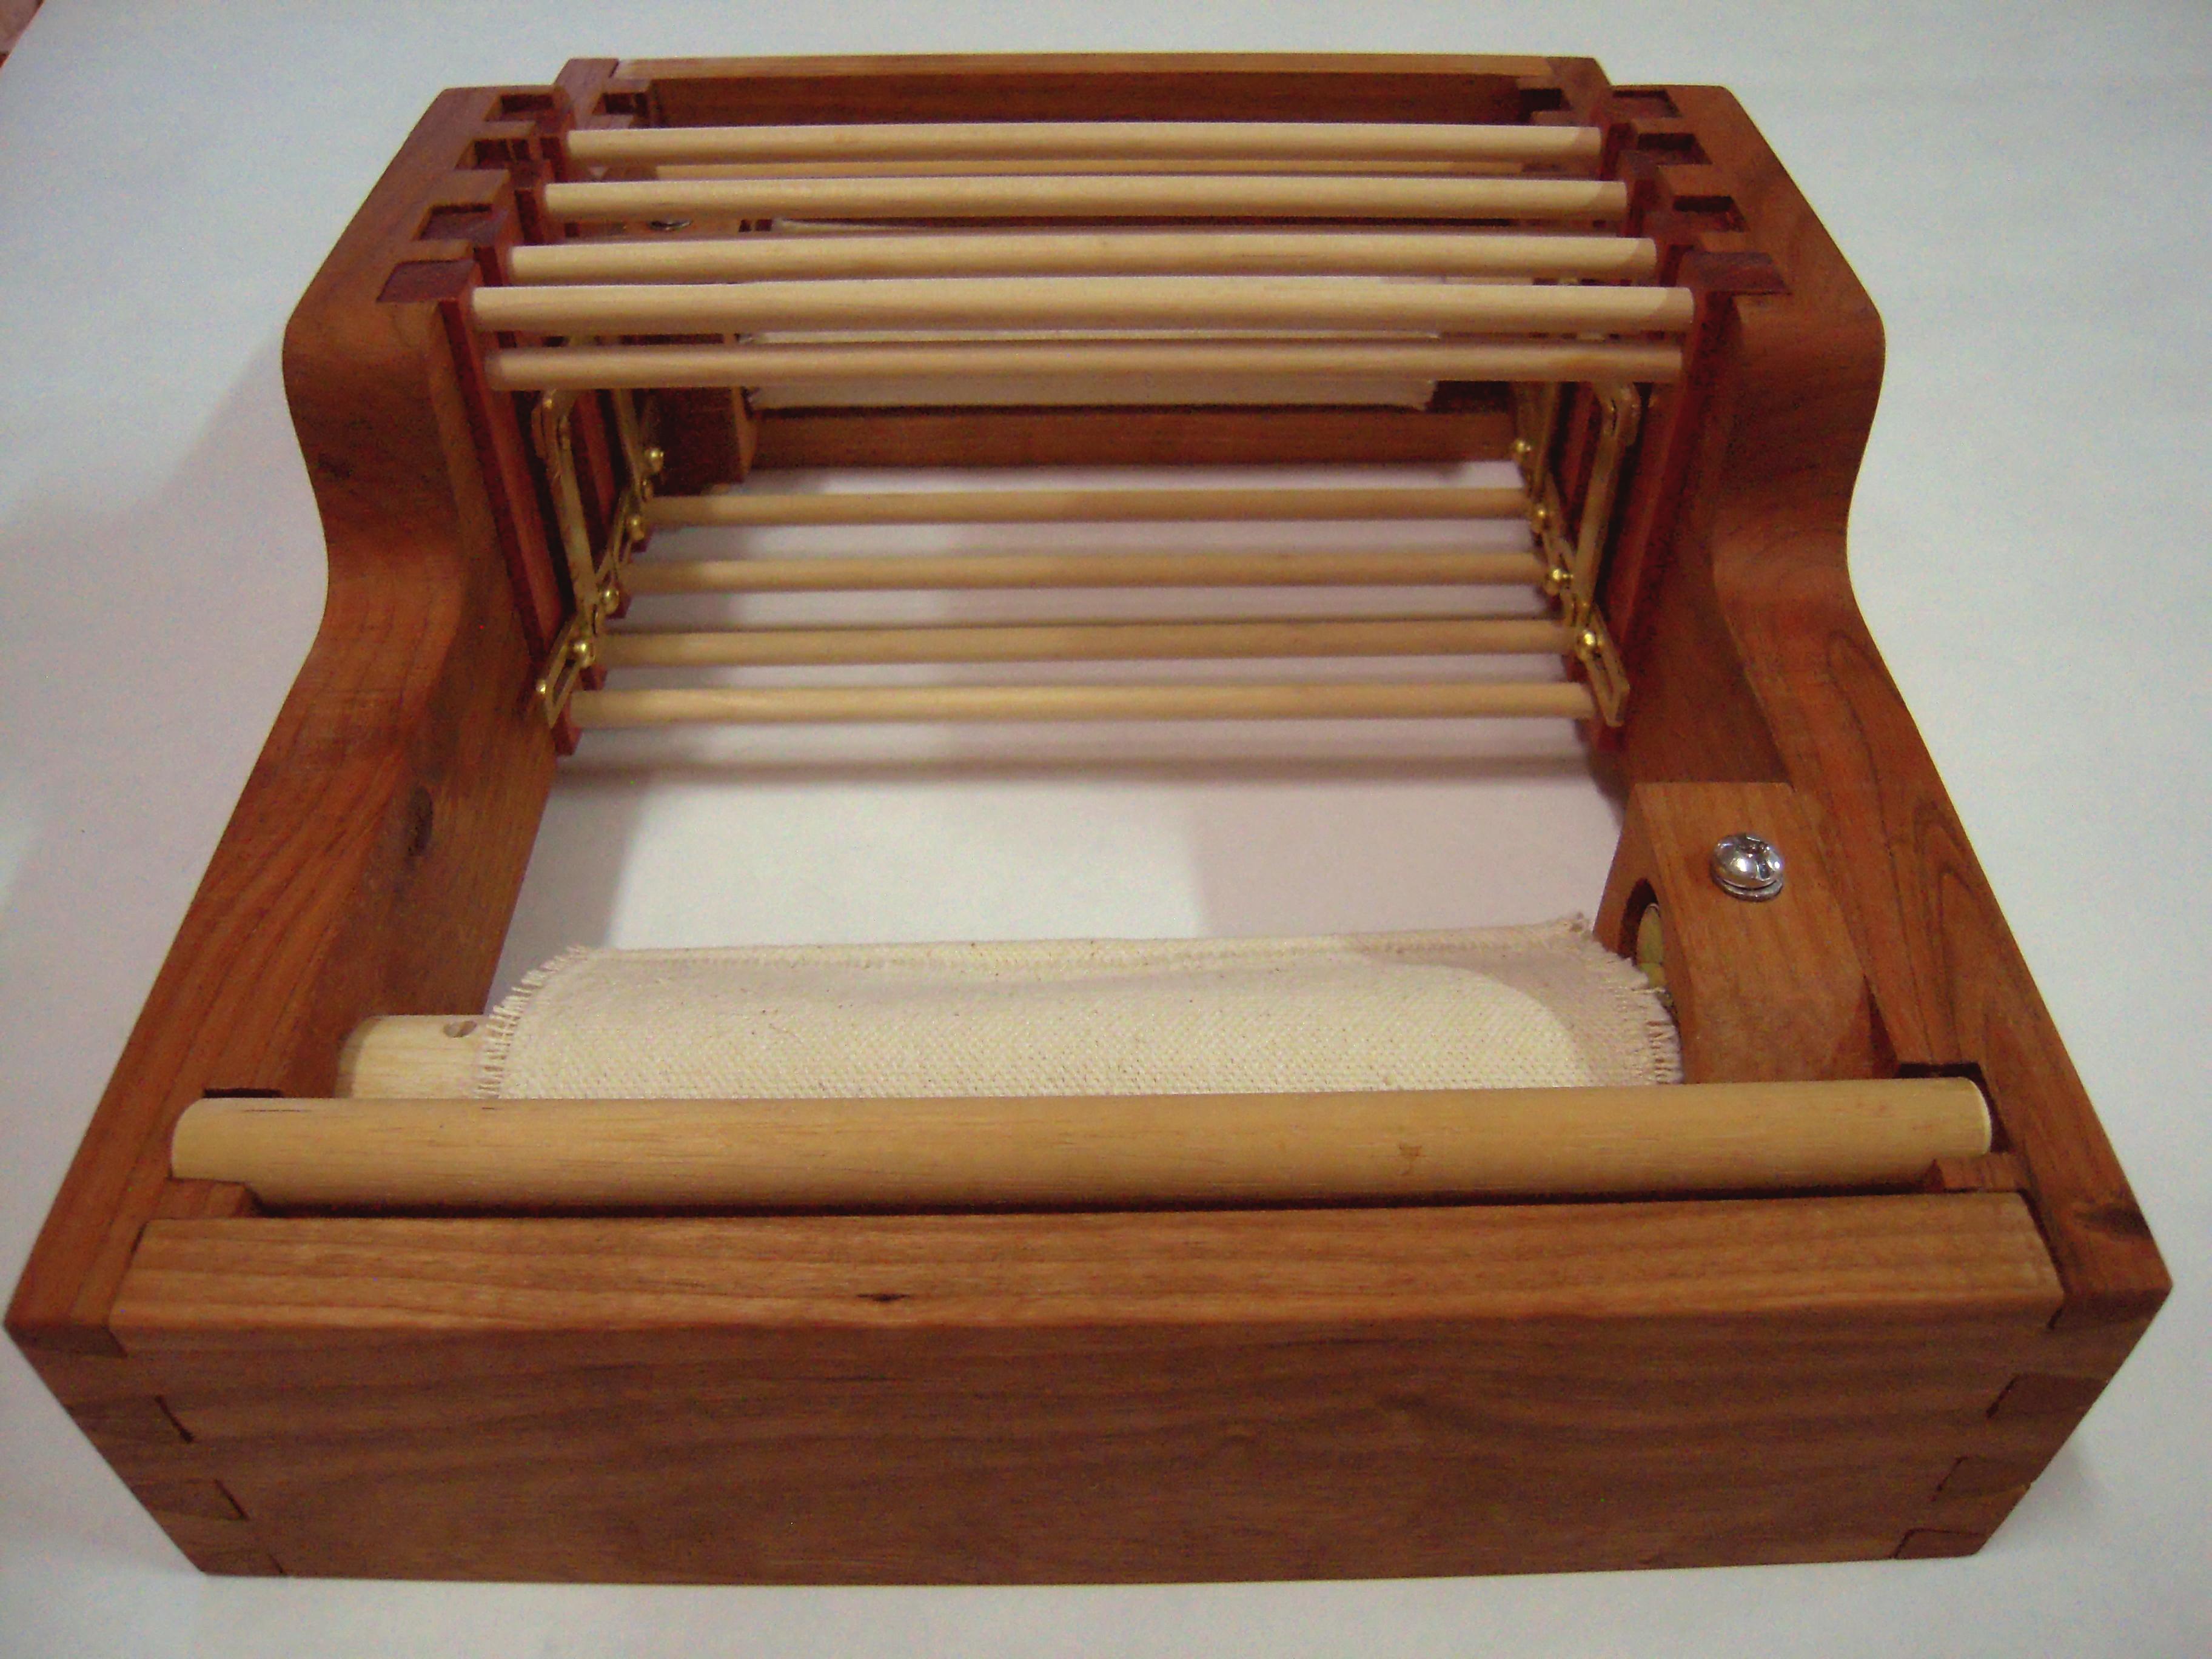
12. loom complete
13. loom bottom view
My next chore will be to tie about 400 very small string heddles. To transfer them to the shafts, the entire harness assembly can be lifted out of the frame, and one group of shaft sides pulled off the connecting dowels.


This is a very useful post as I was looking for ways to build the lever system without having to release each shaft manually.
Is there anything to lock each set of shafts into place after you switch the levers, until you finish passing the shuttle through?
About a locking mechanism I can’t really explain, but it seems to be a result of the articulation of the metal arms of the counterbalance harness: it takes more effort than if the shafts were free-floating to make a shed opening, but then it tends to hold its place.
Anyway, for the slow pace of the weaving I do using bobbins (see part 3 of the Toy Piano article), it’s not too much trouble for me to put a “sword” in the shed opening to hold it open and leisurely check for threads stuck down or up. Best, Peter.